
DIY OFF-GRID WORKSHOP: Can a Bluetti AC200MAX perform hard woodwork?
How to turn two bits of scrap plywood into four wheel chocks that’ll last for years, assist roadside repairs and general jacking duties - and try it entirely off-the-grid.
Plus, some basic production engineering skills which will make repeatability in your workshop much easier.

In this workshop-heavy report we’ll turn two pieces of scrap ply into a set of four wheel chocks, using some basic production engineering that you can apply to your DIY project, to slash the burden of measuring and marking everything. Plus it makes repeatability simpler.
Of course, I’m going to do it all completely off-grid, using the Bluetti AC200MAX portable power station - without once plugging anything into the mains. If the Bluetti doesn’t power it, I’m not using it. So let’s rip.
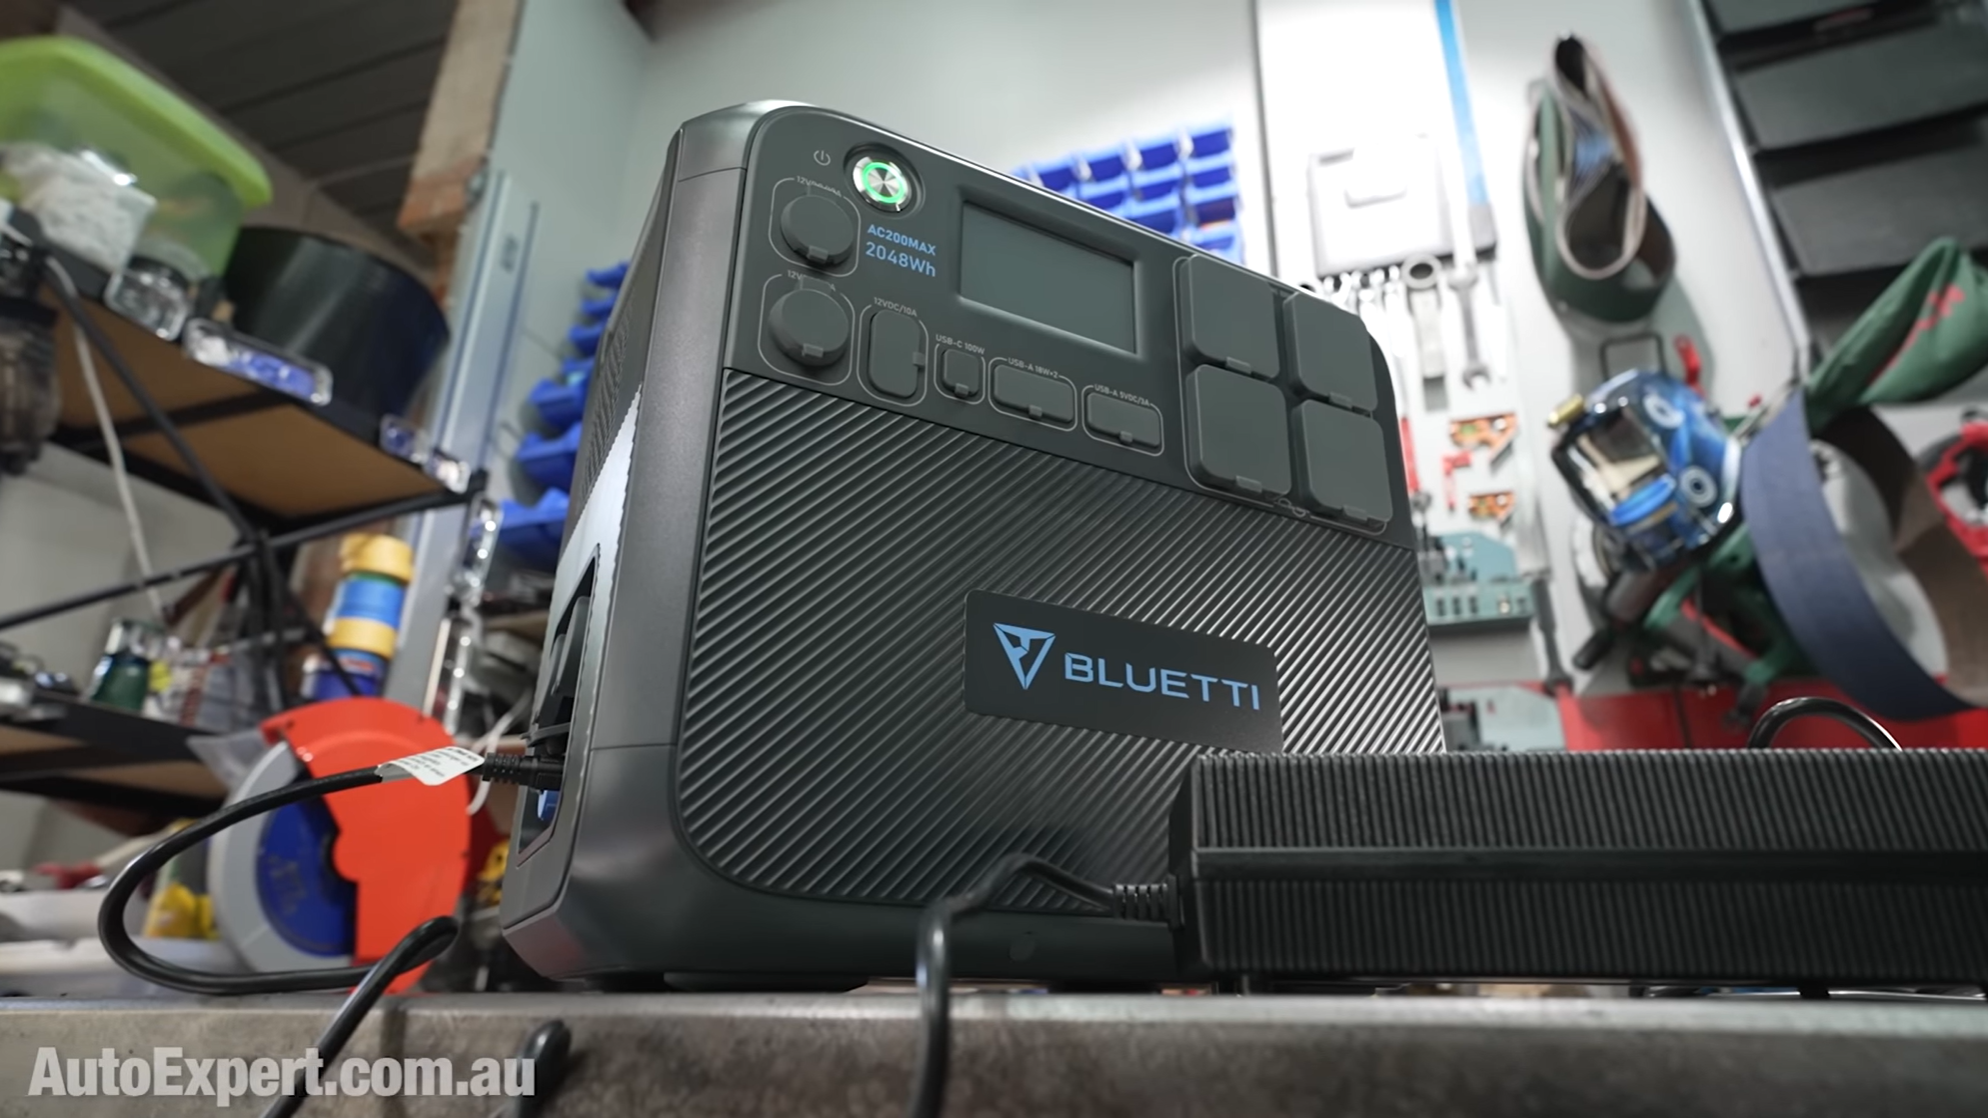
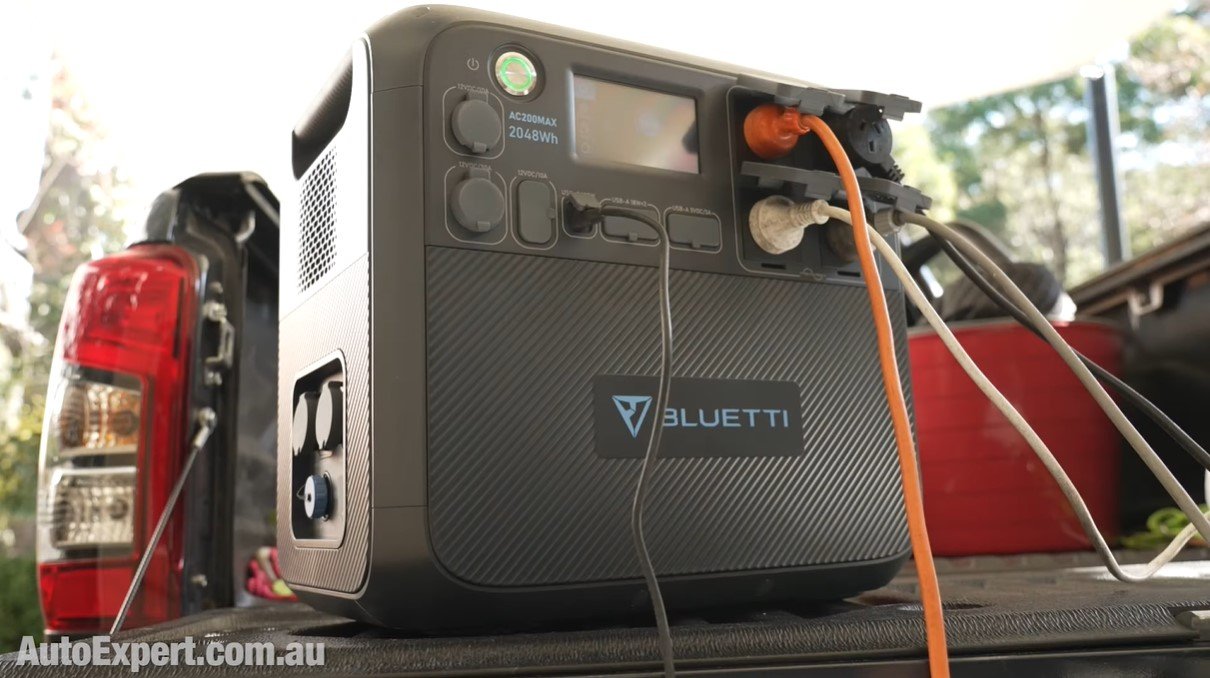
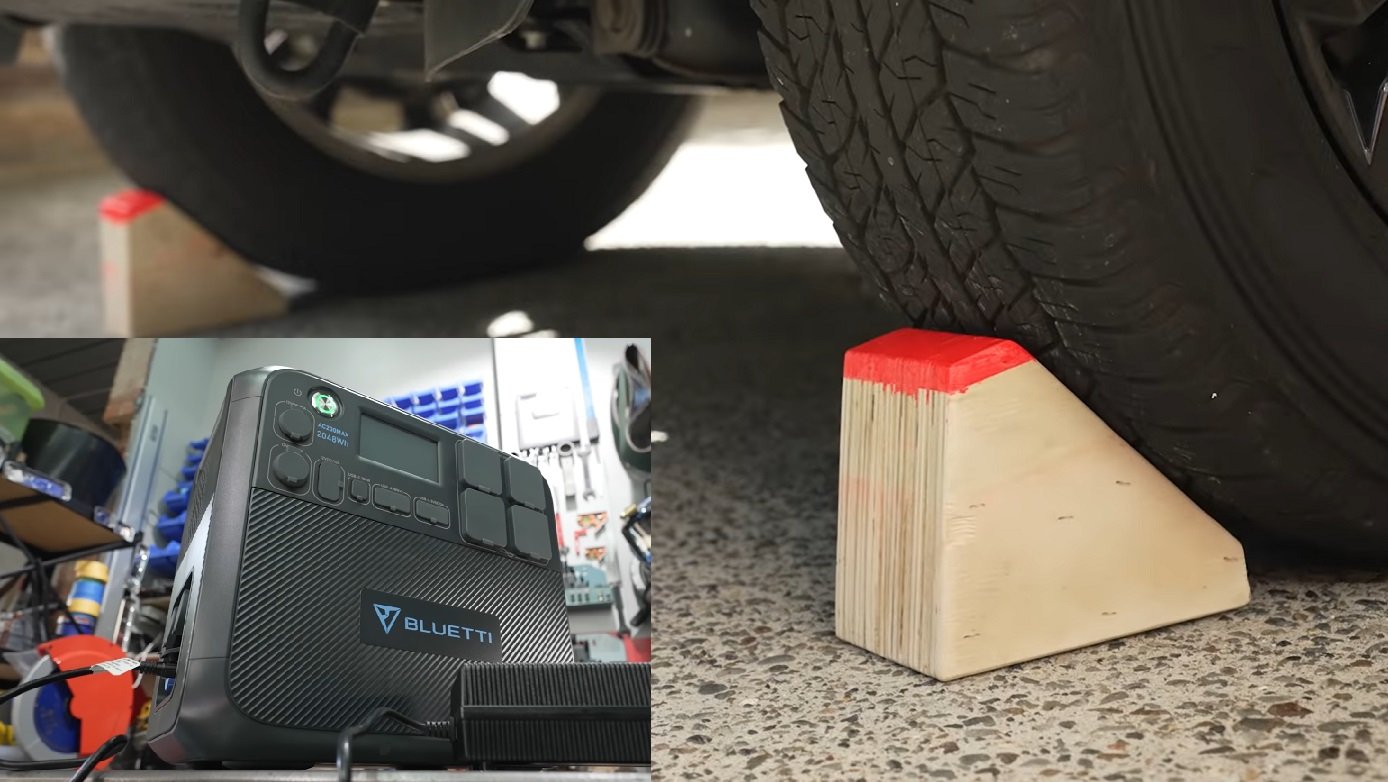
Bluetti supplied the AC200MAX which I’ve reviewed here >>. So I won’t rabbit on too much about the specs. Basically it provides 2000 watts of pure sine wave 240-volt AC power, plus several USB outputs, 12 volts DC and two inductive charge pads for the mobiles.
Lithium-iron-phosphate chemistry makes it durable and robust. It’s an excellent backup for our increasingly beat-up, broke-down grid, with the prospect of power failures becoming ever more likely.
The AC200MAX works for camping, boating, caravanning, working onsite off the grid (like we’re simulating today), and keeping the essentials at home fired up if the power goes down - refrigerator and TV, few lights, kind of thing.
You can also check out my OG Bluetti AC200P review here >>
Or get answers to questions like ‘Can a Bluetti jumpstart a car?’ >> or ‘Is a Bluetti better than a dual-battery 4WD setup?’ >>
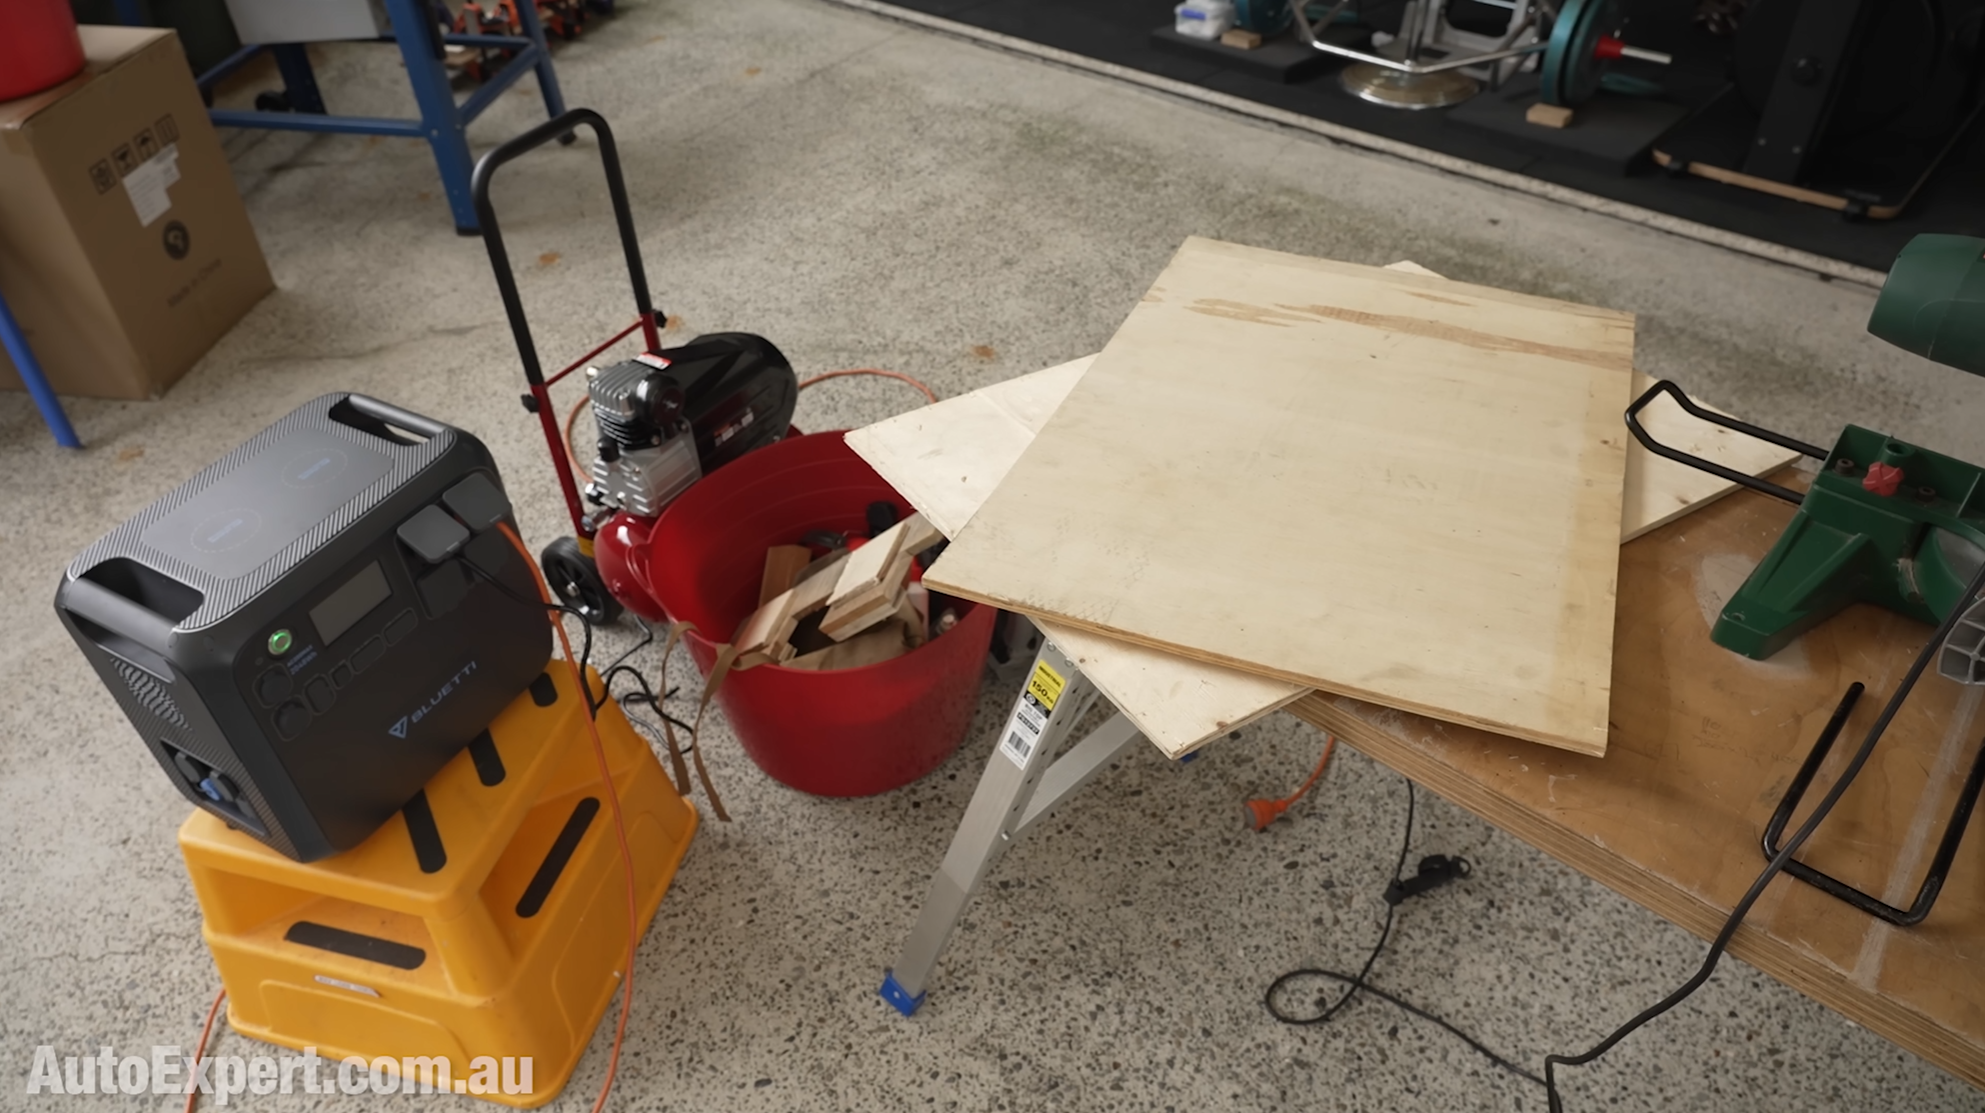
I ended up with two scrap pieces of 10mm ply when I bought a benchtop 10-tonne hydraulic press. The ply was the box. And I wanted to do something worthwhile with it, because it’s a waste to throw it into landfill. It’s certainly not furniture grade ply, so the options were limited to something more ‘ghetto’…
Being the A-grade engineer I am, instead of doing research, measurements and calculations, I diligently ripped off the design of a rubber chock I already had lying around the Fat Cave. There is no need to reinvent the wheel - or its chock. Speaking of, here’s Everything You Need to Know About Jacking up your Car >>
So, I cut a template out of cardboard - the universal production prototyping material. With that done, you just have to think about setting the job up to minimise waste, and what tools you’re going to use to turn the stock you’ve got into the workpieces you need.
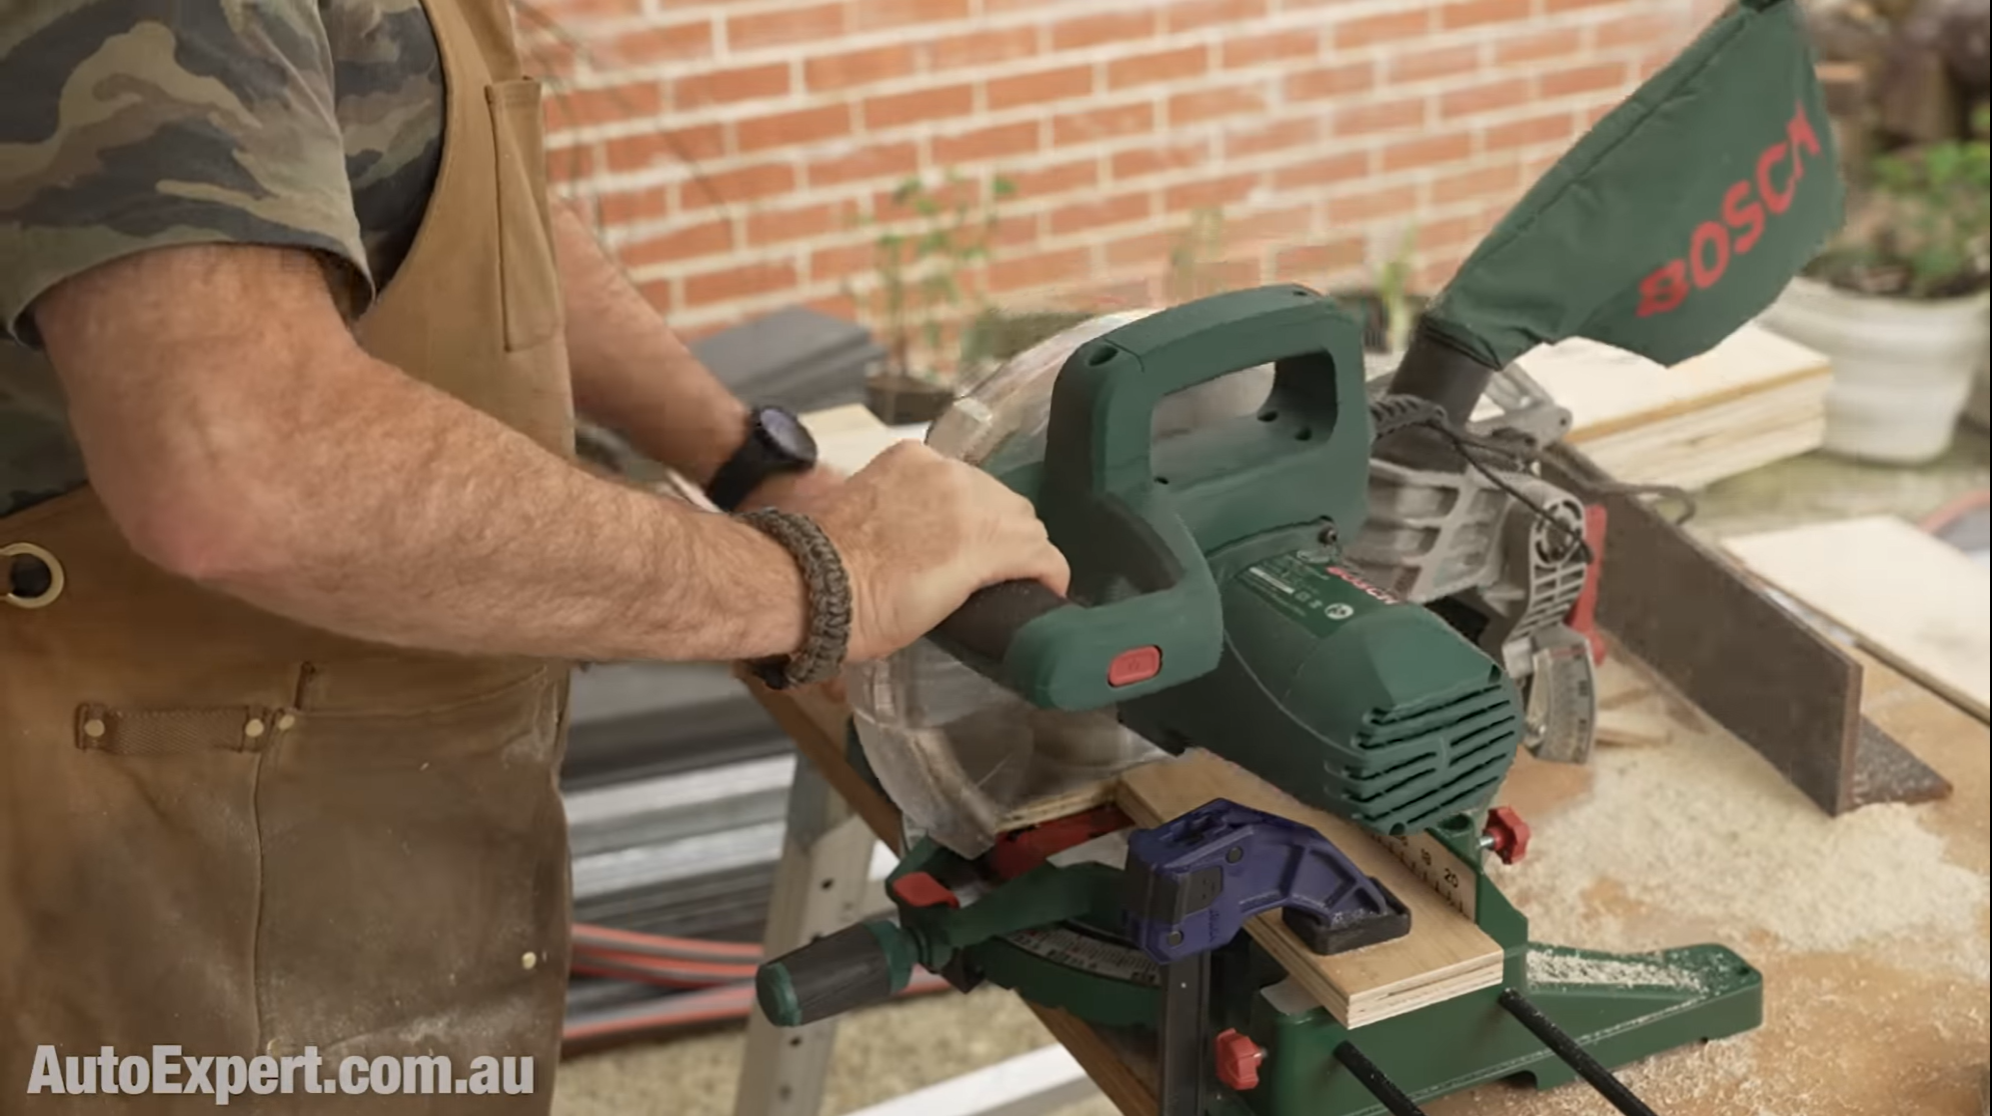
You could cut this all out by hand. (Not too hard, but boring. There’s five edges per piece, and you need 40 pieces.) Or with a jigsaw, or a bandsaw. I’ve got a job-site table saw, so I was gunna use that.
Small problem: The table saw is 2200 watts, and the AC200MAX won’t run it. (I tried. It just kept tripping.) But it will run my drop saw, which is a Bosch unit rated at 1800 watts. (It’s just a chop saw, and yeah - a radial-arm version would have made the job a lot easier.)
My AutoExpert AFFORDABLE ROADSIDE ASSISTANCE PACKAGE


If you’re sick of paying through the neck for roadside assistance I’ve teamed up with 24/7 to offer AutoExpert readers nationwide roadside assistance from just $69 annually, plus there’s NO JOINING FEE
Full details here >>
AutoExpert DISCOUNT OLIGHT TORCHES


These flashlights are awesome. I carry the Olight Warrior Mini 2 every day - it’s tiny, robust, and super useful in the field or in the workshop. Olight is a terrific supporter of AutoExpert.
Use the code AEJC to get a 12% discount >>
Generators suck! Go off-grid with AutoExpert BLUETTI PORTABLE POWER STATIONS
Need mobile, reliable power? If you’re camping, boating, caravanning or building a dirty big shed in the back paddock, and you need to run a refrigerator, lights, air conditioner, cooking, and/or a bunch of tools - Bluetti has a clean, tidy, robust solution…
Get your AutoExpert free shipping discount here: https://bit.ly/3n62heK
REPEAT OFFENDER: Making multiples of the same thing
First job here is to rip the stock into 150mm strips, which is about six inches. This is not an exact science - you’re just aiming for consistency.
I spent 10 minutes with some scraps of old pallet wood and offcuts to make a jig that’s essentially just a clampable rip fence set at 150mm cut width. No need for measurement after that - just clamp and repeat.
Use as many additional clamps as you need to secure the work to the bench. Then you’ll have both hands free to drive the power tool. Pro Tip: If you’ve got both hands on the saw, it’s actually very hard to cut your fingers off. One-handed: not so much.
And, if you’re a leftie like me, learn to use a power saw right-handed - circular saws, in particular, are very dangerous to use left-handed. It’s not that hard. Adapt, improvise and overcome, leftie, dude. You’ve been doing it your whole life. I know I have.
And wear appropriate PPE: AS1337 eye protection, hearing protection. Take some personal responsibility. If you’re working inside, get dust extraction, and wear a mask - that’s not as critical outdoors. I prefer to do wood projects outdoors, mainly because one’s Fat Cave doesn’t fill up with sawdust.
If you end up with a bunch of strips all 150 wide, and all 10 fingers still attached, you got this first step mainly right. It should inspire some confidence. I started with the Bluetti fully charged, and the ripping took me about 15 minutes. The 2048 watt-hour battery in the Bluetti was sitting on 95 per cent capacity remaining with all the rip cuts finished.
That’s 10 strips, about 500 long and 10 thick. The saw is 184mm diameter and rated at 1500 watts, and the Bluetti drives it easily.
From a production engineering perspective, the most efficient way to do projects like this is: do one operation (like, all the ripping), then move to the next operation. Do the same operation on all the parts; then re-jig for the next step.
So, the stock has two reference surfaces - the long sides of each strip. And I can use them to get a third one - this 10(ish)-degree rake on the back edge of each chock. (I never bothered to measure it - but when I matched the angle of the template on the drop saw, the protractor read 8.5 degrees.)
Ultimately I got four blanks out of each strip. So I’m gunna cut those 8.5-degree angles on each end of each strip, and use those angled edges to jig up to lop each strip in half with another 8.5-degree splay. With no measurement (after the setup).
10 strips of ply, times four blanks per strip equals 40 blanks, each 10mm thick. That’s enough for four chocks 100mm wide - so the 15 minutes I spent hunting for additional ply, just in case I needed it, which I’m not actually going to need? Yeah, dude, that’s a quarter-hour of my life I’m never getting back…
The drop saw is 1800 watts and it has a 254mm blade. It takes a lot of electrical grunt to whip it straight up to 4500rpm - like, a big surge, briefly. But the Bluetti is rated for 4800 watts on surge - so, no problem with this tool.
For the middle cut, I screwed the drop saw into the bench to fix it temporarily, and clamped a chunk of offcut angle iron in place as a ‘ghetto’ end stop - one that never fills up with sawdust.
And after that, it’s really just a matter of improvising additional stops with clamps and scraps - whatever you’ve got on hand - to make subsequent cuts repeatable. You’re aiming for a chock that’s 150 high and has a 45-degree face that engages with the tyre tread. Everything else is just aesthetics.
If I’d had a radial-arm drop saw I could have cut the 45s in one hit, but because I didn’t for this project, I jigged up to flip the workpieces, and I cut the 45s in two steps.

Then I knocked the corners off, repeatably. All up, this was a lot of drop-saw cuts, and a lot of hard starts back-to-back for the motor. All seamless with the Bluetti. With all 40 blanks finally roughed out to size, the battery level was 79 per cent remaining.
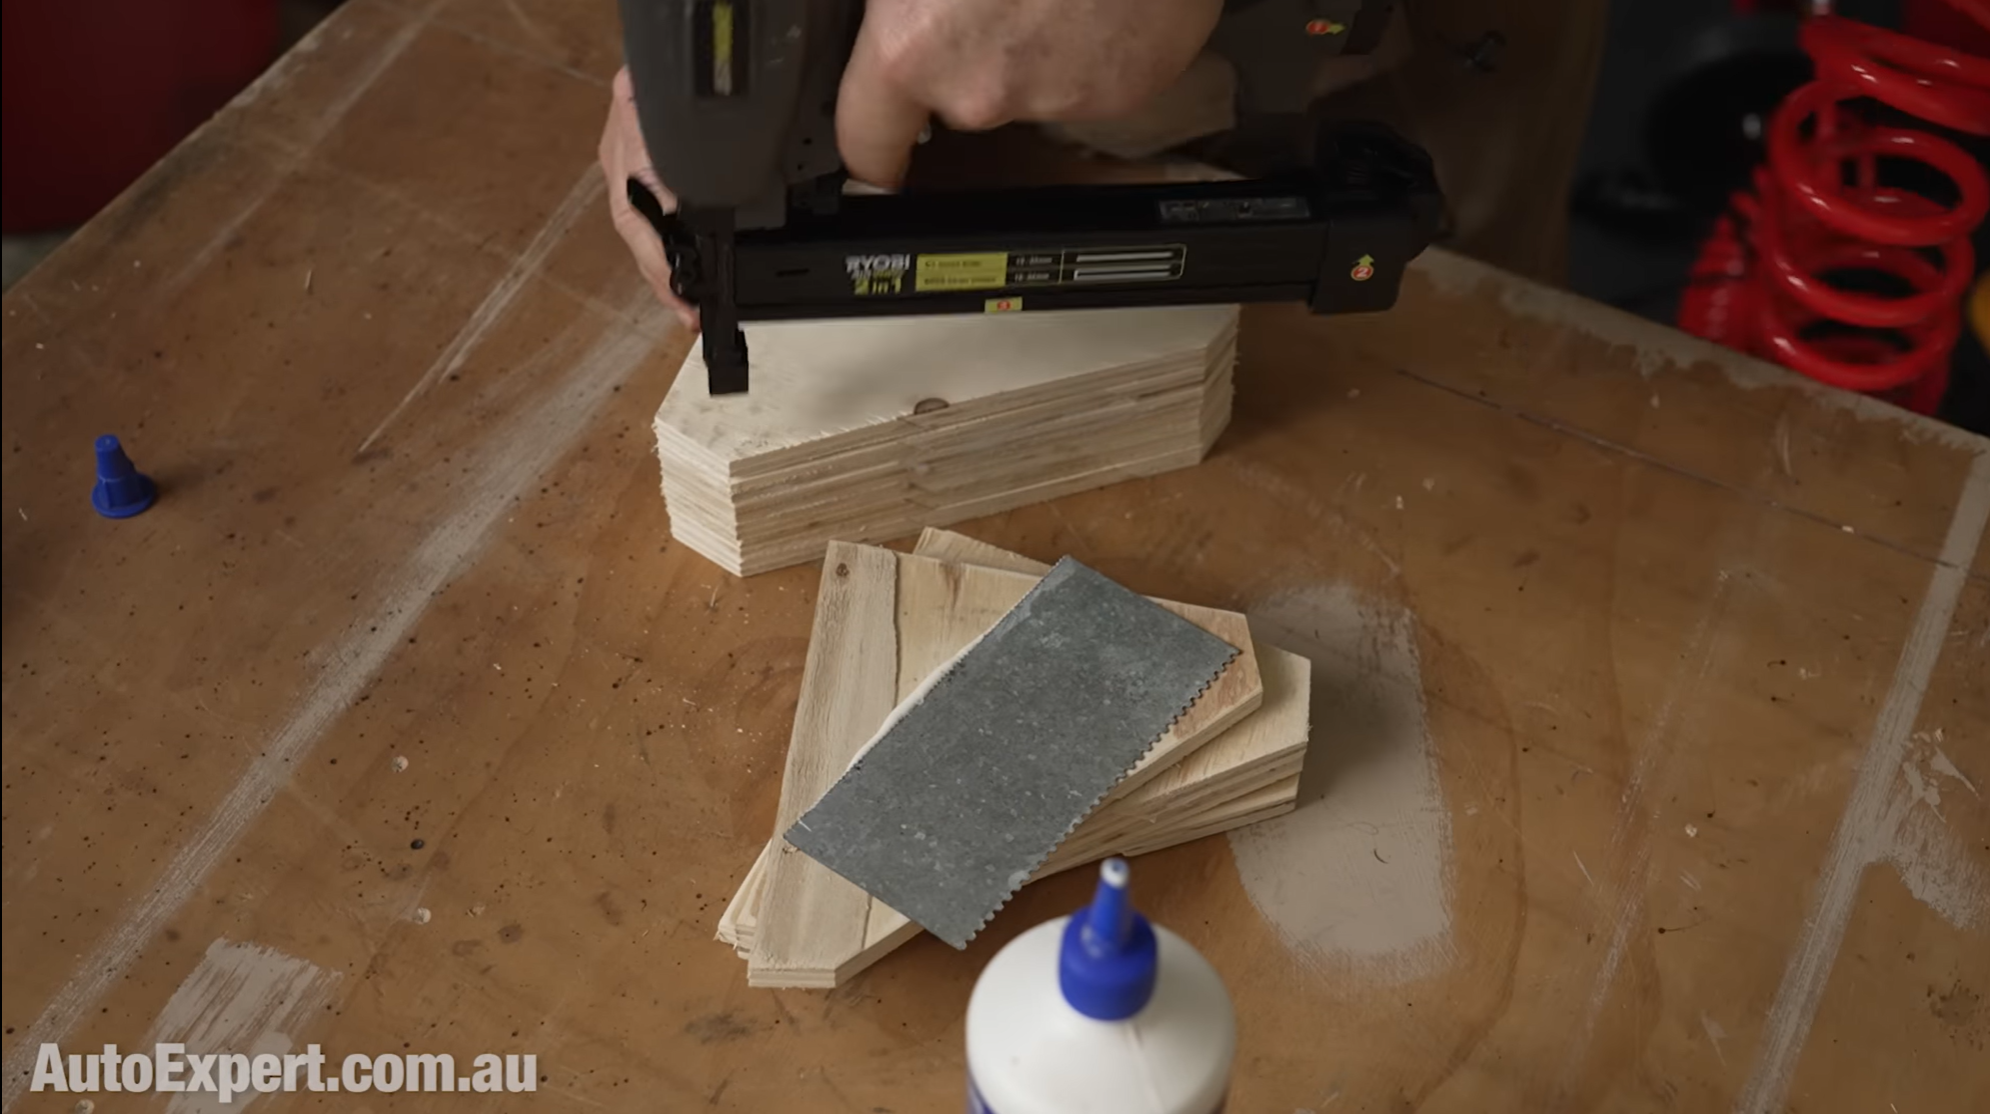
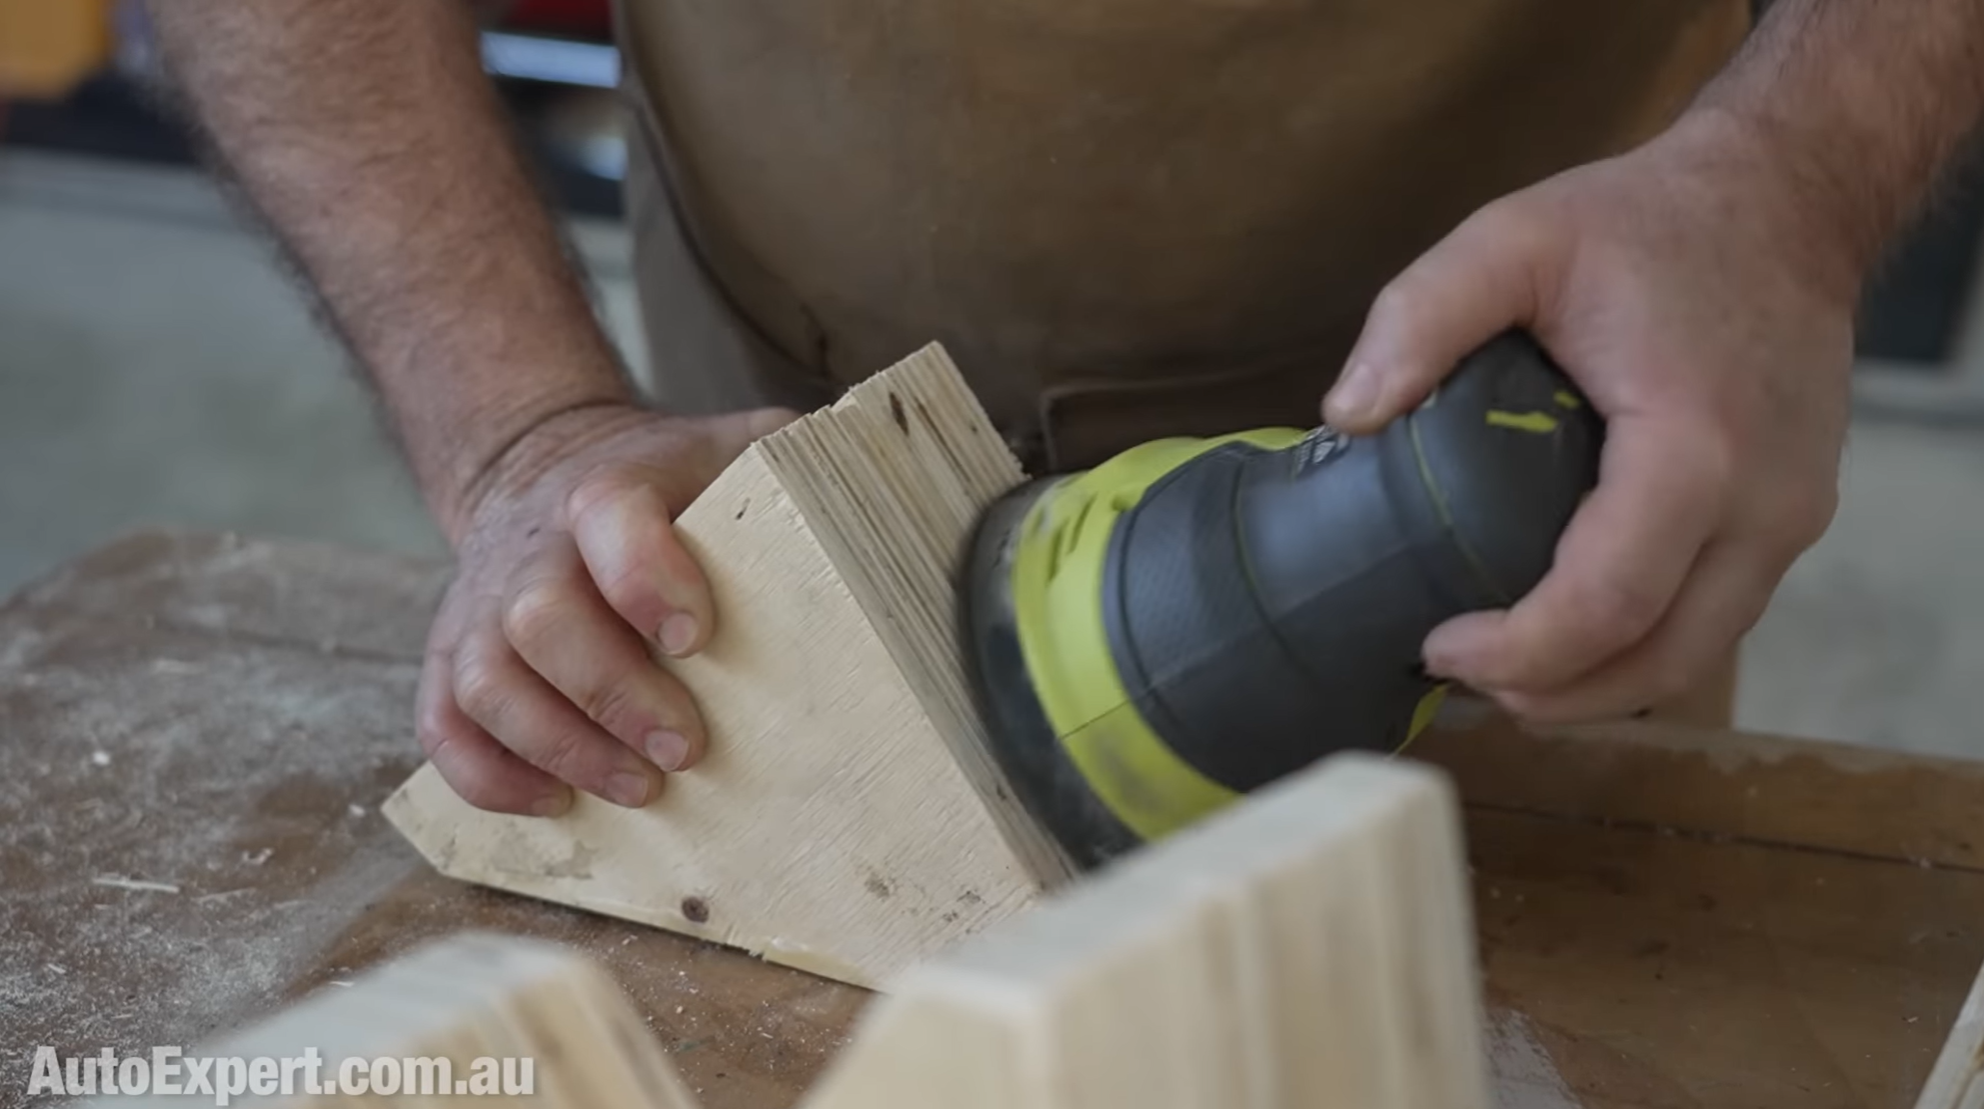
A judicious sand with 120-grit to knock off any rough edges and high spots drank a further two per cent of remaining battery, and then it was time for glue-up.
The plan here: 10 laminations per chock means nine glued joints per chock. I’m using standard PVA wood glue (the cross-linked stuff - it’s on the bottle). The glue is stronger than the wood, and it’s loaded in shear here, which is ideal for adhesive joints, so no additional fixation is going to be required.
But you do need to hold it in place prior to clamping, and the glued joints are really slippery when wet - so the laminations are very prone to sliding all over the place - which is why I’m securing them here with 20mm brads, and shooting them in with a pneumatic brad nailer.
This is also another opportunity to drive the AC200MAX pretty hard.
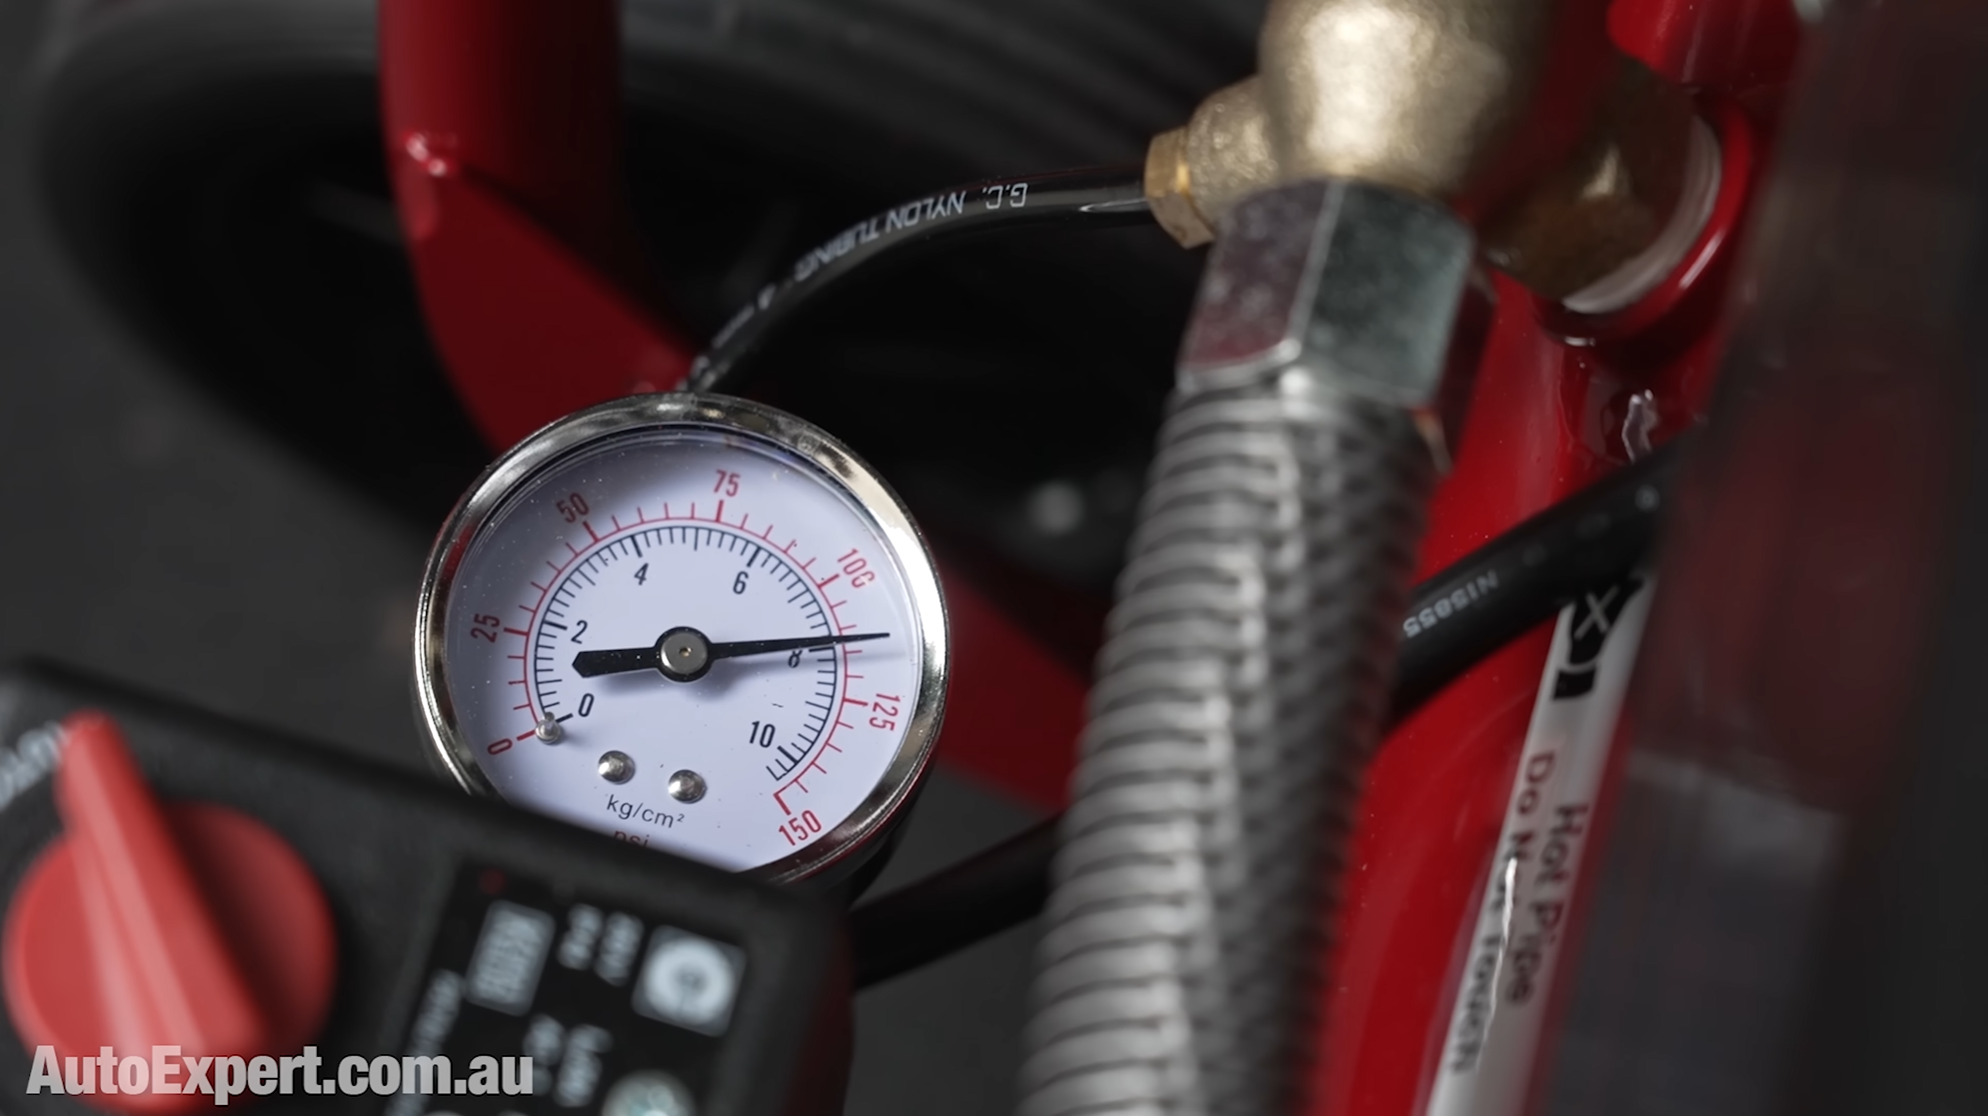
The compressor is a brand new Renegade Industries two-horsepower unit (that’s about 1500 watts). Single cylinder, direct drive. Renegade make some good stuff - a crowd called Trade Tools in Queensland imports them. I’ve got quite a collection now - and it’s pretty impressive kit. (I don’t have a relationship with them, beyond being a fairly satisfied customer.)
Anyway, I bought the compressor specifically for this test as a realistic example of what you might take off-grid, and it’s highly portable - so, ute and van-friendly. I plugged it into the Bluetti, fired it up and it filled the 12-litre tank to 125psi, like friggin’ clockwork, and the cut-off switch kicked in. Deafening silence. It was ‘textbook’ - so I started glueing and nailing.
And then, three or four laminations in, in the immortal words of Jim Lovell (or maybe it was Jack Swigert) on Apri 14 1970, ‘Houston, we had a Main Bus B undervolt’. Or in this case, an inverter undervolt alarm.

I have to stress that this alarm was just the Bluetti telling me I was whipping it too hard by asking it to crank the compressor against that 90psi internal pressure.
This is pretty much the second time I’ve found the limit of the AC200MAX’s off-grid workshop capability. It’ll - just - drive the compressor, the same as it will just drive my Lincoln Electric MIG welder loaded with 035 flux-core.
Having used it a lot now, I’d say that for general carpentry and metal fabrication tools (most saws and drills, angle grinders, drill presses, I’ve used it to drive a mag drill) the AC200MAX is ideal. But for really grunty machines - especially ones that need to crank from stopped, under load - it might not be ideal.
And if you want it to do something of that nature, you’d want to test it exactly as you intend to use it, before going into the field and hoping for the best.
Anyway, next day, the clamps came off, and I tidied up the rough chocks - tweaked the short cuts on the drop saw, hand planed the long sides, and gave everything a final sand - 40-grit to beat any high points into submission, and 120 for a final finish. They’re not perfect, but then, we’re not making furniture for Buckingham Palace, are we?
I sealed them with some more PVA - Bondcrete in a can. The ply sucks it up, it fills the voids, and it dries fast, hard and waterproof. Then I did the roughest masking job on earth and carrot-topped them with some spray enamel, as discussed. I didn’t film that because it would be - literally - a documentary of watching paint dry. And there are some lines even I don’t cross.
I’m pretty happy with how they turned out. And there was almost no waste - mainly because I thought about it carefully before cutting anything. Thinking first and cutting second is a process many DIY-ers get arse-about.
At the end of this process, including vacuuming up the plane shavings inside the Fat Cave, there was still an indicated 51 per cent remaining capacity on the AC200MAX. In other words, I’d used about 50 cents worth of electricity (at peak rates) and had a reasonably pleasant afternoon outside the Fat Cave, in the fresh air, composing yet another fine symphony in Power Tool Flat.
And this is achievable during a power failure, potentially. The Bluetti’s 50-odd per cent remaining power is certainly enough subsequently to crank the refrigerator through a couple of cooling cycles overnight, run a few LED lights, recharge the laptop and mobiles to keep in touch with the outside world, power up the TV, et cetera. (If the grid is down.)
If the sun is shining during your DIY marathon, you could conceivably lay out a couple of Bluetti’s solar panels and recharge while you’re working. (The AC200MAX is compatible with being simultaneously charged and discharged.)

These two panels here (called SP350s) develop 350 watts maximum each - total of 700 - so if you can get three hours of full, super-bright summer sunlight, that’s a complete sun-powered recharge for the AC200MAX.
(The AC200MAX has an onboard solar charge controller, too, so all you need to do is plug the panels in without stressing too much over the technicalities.)
Right now, in Sydney, however, it’s just four weeks after the winter solstice, so the sun is pretty much at its lowest elevation and intensity, and there was a lot of wispy, high-level haze between it and me on the day.
Even so, the solar panels were delivering consistently over 200 watts - which would see the AC200MAX fully charged in five hours. And just for complete clarity - the panels weren’t in play while I made the chocks. I deployed them the next day.
Two kilowatt-hours is a pretty impressive start to an otherwise bleak evening, if the power is down. Like, you’d be the envy of your neighbours. So, all-up, this was a productive afternoon - plus not having to live the neanderthal life later on, during a power failure.
And it’s not just power failures. You might be building a shed out in the boonies. This project is an example of the kind of thing you can achieve off-grid, if you have work to do and there’s no onsite 240-volt supply. There’s no generator screaming in your ear while you’re trying to think. Or annoying the neighbours at 10pm.
It probably took about three or four hours to make the four wheel chocks from scratch. And if you’re wondering why I didn’t just buy a pair of Chinese made chocks for $20-$30 on Amazon: it’s just satisfying to make stuff. And it gives the people you live with a well-earned break from you. They deserve that, dude. Good for their mental health, and yours, kind of thing.
The only problem I have with this DIY crap is: everything you make this way is a prototype, so if I had to make another four chocks, they’d be twice as good, and I’d get it done in half the time.
I guess the other thing that can happen is your inner perfectionist can overtake you, if you’re not careful. If they stop the car rolling when you’re jacking it up: They’re good enough. These are certainly better than they need to be, from a ghetto engineering perspective.


The Kia EV3 is the brand’s entry-level fully electric model and when you take into account its price and the level of equipment, the astounding build quality and segment-leading refinement it offers compelling value. If you want affordable luxury with the daily dependability of an EV, you might be on a winner here…