
GET JACKED Part 1: Everything you need to lift your jacking game
Here are the basic tools you need to stay alive in your garage when working on your own vehicle. Plus, some important best practice tips for using them…

Cheating death is the Prime Directive of all Fat Cave Operations. Every machine, every process down there, every tool and task - it all wants to murder you. Generally, in a very mediaeval, painful and occasionally even spiteful, fashion. And not always quickly.
Here are the tools and equipment you need to not only get the job done right, but to stay alive while working under your vehicle, because it’s not fun being dead.
Electrocution, ballistic projectiles, entrapment, mangling with ‘extreme orthopaedic surgery challenge’. Vivisection, traumatic amputation, burns, scalping, if you’ve got hair. There’s de-gloving, if you wear a ring (so many nerve endings in the human hand). Being dragged into a rotating machine is a special kind of pain, being choked with carcinogenic dust is full of prolonged, slow consequences.
Just being outright crushed is the primary outcome we’d like to avoid in this exercise. It’s not much F-U-N.

In this situation, that car is a proper American Psycho; it hates you, it loathes the very idea that you exist and take from the natural world.
Be warned, jacking a car up, and getting under it is not without risk. But it’s fun, and you can get cool stuff done, and feel good about doing it. So, this is Part One in a four-part series.
Part One: The gear you need to do this properly. Not over-the-top, F1 garage stuff - just the basics for efficiency and safety.
Part Two: Basic best practices when you do this.
Part Three: Jacking up a car with a full chassis - like a ute, or a 4X4 wagon.
Part Four: Jacking up a unibody vehicle - such as most cars and light-duty SUVs.
At the end of this process, my ambitious aim is: You get all four wheels off the deck and do something worthwhile, and you live to bore the family to death with it, at tea time.
DISCLAIMER
At this point, it’s healthy to ask one sceptical question: Why take advice from me? Well, for starters I’m old, I’ve done this a lot, I’m still here, and very much intact. I have a degree in mechanical engineering, been trained in heavy industry and have worked around cars my whole life.
So, I can show you the tools and give you all the advice possible, but you have to get it right. Meaning, you have to take full responsibility for not crushing yourself to death here. Because an elevated car wants to murder you.
Fat Cave Ops like this are a daily exam, and you have to get 100 per cent every day; 99 per cent and the car murders you. It’s serious.
A lot of people don’t get this, because they have lives where there are no consequences. Forgetting your password, locking yourself out of the house, blocking the toilet - this isn’t that. The consequences here can kill you.
Take it seriously, think it through, pay attention, take your time and don’t cut corners or get lazy.

To crush the job, or be crushed by the job? That is the question.
Why are we here?
Every 5000kms, you might want to rotate the tyres. Meaning, you want to put the front tyres on the back, and the back tyres on the front, but keep them on the same side. It evens out the wear and it maximises tyre life. It gets you up, off the couch. That’s worthwhile.
While you’re ‘down there’ you can check things like seals for leaks, and get ahead of mechanical disaster, and assess the brake pads. Getting intimate with your car is good. Provided you don’t die.
You can, of course, do a job like this with the jack that comes with the car, but this is a royal pain in the arse. (Obviously, if you’ve got one of those cars with run-flats, or a hasty factory hybrid conversion with no spare tyre, you can’t do it at all.)
But if you’ve got a conventional jack and a spare, you have to jack up corner one, fit the spare. Jack corner two. Fit tyre one to corner two. Go back to corner one, jack it up again and fit tyre two. And repeat, for the other side of the vehicle.
Six different jacking operations using the worst jack ever, basically. Do-able. Not fun.
My AutoExpert AFFORDABLE ROADSIDE ASSISTANCE PACKAGE


If you’re sick of paying through the neck for roadside assistance I’ve teamed up with 24/7 to offer AutoExpert readers nationwide roadside assistance from just $69 annually, plus there’s NO JOINING FEE
Full details here >>
AutoExpert DISCOUNT OLIGHT TORCHES
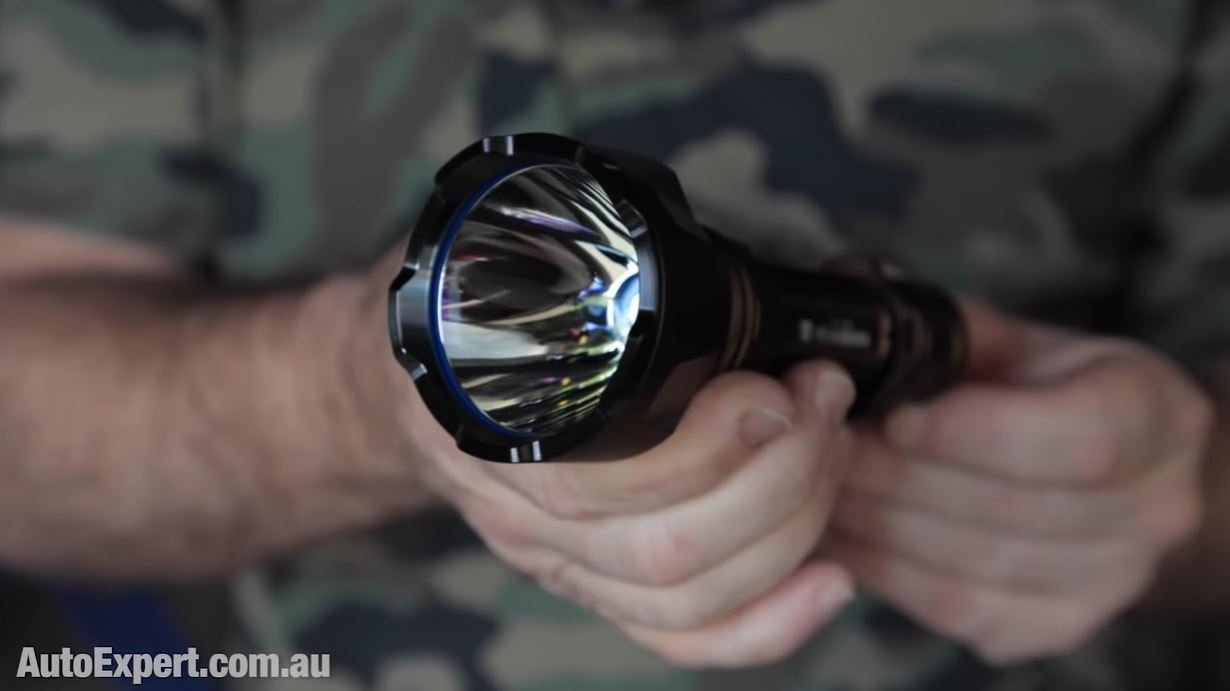
These flashlights are awesome. I carry the Olight Warrior Mini 2 every day - it’s tiny, robust, and super useful in the field or in the workshop. Olight is a terrific supporter of AutoExpert.
Use the code AEJC to get a 12% discount >>
EQUIPMENT: In Summary
2000kg alloy & steel Impact trolley jack: Details here >>
2000kg low profile Impact trolley jack: Details here >>
4000kg Impact jack stands: Details here >>
600mm Toledo 1/2-inch drive breaker bar: Details here >>
900g Gearwrench brass hammer: Details here >>
Pair of h/d rubber wheel chocks: Details here >>
Set of five deep impact 1/2-inch drive sockets with alloy wheel protectors: Details here >>
The best way to not hate jobs like this is to start with a decent trolley jack. One for a Fat Cave, as opposed to a V8 Supercars pit crew, a trolley jack is essentially a lifetime purchase. It will last you decades, so don’t cheap out, but you also don’t need a Borum air-over-hydraulic jack for $4000 or something.
DISCLOSURE:
I got together with Auto One for this series, they’re helping us out. I got the idea for this series from one of their press releases. They’d just opened a big, new store down the road, on the site of a dealership that went ta-tas up. So I went in covertly, in plain clothes, and mystery-shopped them. The customer service was excellent. I looked around and instantly wanted one of everything, as you do.
They sent out the jack and four stands for the project. Retail cost, about $650. But they’re not sponsoring this video. They’re helping us out. I’ll put links to the products in the description, but I’m not getting anything out of it, except that warm, and fuzzy feeling typically associated with being a journalist.
KNOW YOUR EQUIPMENT AND HOW IT WORKS
The Jack

The jack is this Impact 2000-kilo trolley jack. It’s alloy and steel; not too heavy, but solid, and it feels quite slick to use. It should last you for decades, provided you don’t store it in the ocean.
It’s got a two-pump hydraulic system so it moves fast when there’s no load. The upshot is it covers the distance from collapsed to the bottom of the diff housing, or something, in just a few pumps. And then, when the load comes on, it goes into ‘high pressure’ mode and not all that much manual effort is required for the lift. So that’s a pretty nice feature.
Collapsed, it’s 100mm high, full extension is 465mm. That’s a decent lift, 365mm, and it’s compatible with most cars (because the minimum ADR ground clearance is 100mm - and that means most spots under cars are higher than that). If you’ve got a track car that’s radically lowered, you’ll probably need a low-profile jack. But for road cars and 4WDs, this kind of thing is ideal.


A quality jack is a priority here. It’s the key to getting the job done - and keeping you alive long enough to get those also-all-important axle stands in place.
Impact is Auto One’s in-house brand. And I know some in-house brands can be a bit ‘cheap ‘n’ nasty’ from time to time, but that’s not my take here. If it was, you wouldn’t be seeing it.
This jack also has an inbuilt overload protection system, so if you attempt to lift the QE2, it’ll just refuse to do it. And you need to be aware that all jacks sold today must comply with a mandatory Australian Standard. It’s called AS 2615:2016.


Essentially, this means it’s been subjected to a range of rigorous tests, and passing them was not optional.
If, perhaps, you’re looking at buying an old, potentially dodgy jack on eBay, or you’ve got one like that in your Fat Cave, I’d suggest this is not an area where corner-cutting is a good idea. Standards compliance for jacks got made mandatory in 2016 for a reason. Reasons like this tend to be written, tragically, in blood.
Australian Standards are designed to eliminate failure modes and give you huge margins of operational safety. The car ‘up there’ wants to murder you. Never forget it.

It’s very easy for something to go quite wrong right in this short window…
On this point: When you jack a car up, you see the jack made of metal, but the load is really just sitting on a column of hydraulic oil under load. And if that fails, the car murders you. So, never get under a car that’s supported only by a jack. Don’t do it.
Axle Stands
You need to use jack stands / axle stands / chassis stands - however you like to call them. Get four of them.
These babies come in pairs - the options are 4000kg or 2000kg, but I’m really not seeing the case for 2000, for most people. You get almost 200mm more work height with the bigger ones. They’re normally $149 a pair, but I’ve seen them on sale from time to time for $99.95.
With 4000 kilos working load limit apiece, overkill is ideal here. You want the biggest possible margin of safety because: car wants to murder you. (See pic above.)


There’s a mandatory standard for jack stands, too: AS 2538:2016. And I know people use all kinds of dodgy crap to support cars. Don’t be one of them.
Masonry blocks, bricks, timber, rocks, bits of steel offcuts - all hugely dangerous. They fail without warning. Wood blocks are often predisposed to failing under the influence of lateral shear. People DIY their own dodgy stands with a welder at home. Unless you’re a boilermaker or a certified pipeline welder, stick to welding cosmetic projects. Make a workbench, or a vise-stand, or something - not something where a life depends on it.
The true value of a properly optimised design like this cannot be overstated. The raising and lowering mechanism is slick. It doubles as a carry handle. There’s a secondary safety support pin - brilliant idea. It can’t let go under load. Wide, square pyramid base - very stable. Standards-compliance means the failure modes you can’t see, which are not intuitive, which allow the car to murder you, have definitely been engineered-out, by brainiacs who paid attention at university.


Against these considerations, these stands are amazing value.
You need a few other things.
A set of wheel chocks. You also need a flat, smooth, level concrete surface - it’s gotta be all four things. It needs to be flat and level so the stands line up with gravity, which eliminates any shearing-type influences that reduce the integrity of the lift.
It needs to be concrete for stability. And it needs to be smooth so the jack can roll under load. Because the arm moves in an arc, and if the surface is rough it can chock the jack’s wheels, and if that happens, the pad can slip and you’ll drop the vehicle, mid-lift. That’s bad.
A few of my favourite things: Wheel braces, torque wrenches, sockets and hammers
You’ll also need a better means of undoing the wheel nuts. The standard wrench that comes with every car is crap. Get a battery rattle gun with an impact socket. (My preferred option.) Or a long ½-inch drive breaker bar, an extension and a socket. Breaker bars are available up to about 600mm in ½-inch drive - and that gives you more than double the leverage of the standard wrench. Or get a cross-type wheel brace, which is dirt-cheap and very effective also.
If you’re buying a breaker bar, get a chrome-vanadium one with a metal end, not a plastic end. You can hit the metal end with a hammer (like, a brass hammer) which is an old fitting and machining trick for profoundly stuck fasteners. Heck out my report, Applied Physics of High Tensile Bolted Joints & Assembly >>
Common sizes for wheel nuts are 17, 19, 21, 22 and 24mm - make sure you get the right socket, otherwise it’s just modern art. And you might need a deep-drive socket - depending on the wheel nut design. Anyway, check your sizes twice and buy once.
And you’ll need a torque wrench, because wheels are held on cars using high-tensile bolted joint design (see my in-depth report on that, and how to grease your wheel nuts). The torque really matters, and you can’t just wing it, using your electric impact wrench and Jedi mind powers. Get a torque wrench with a capacity of about 200 Newton-metres and ½-inch drive. Here’s how to torque your (greased) wheel nuts correctly >>


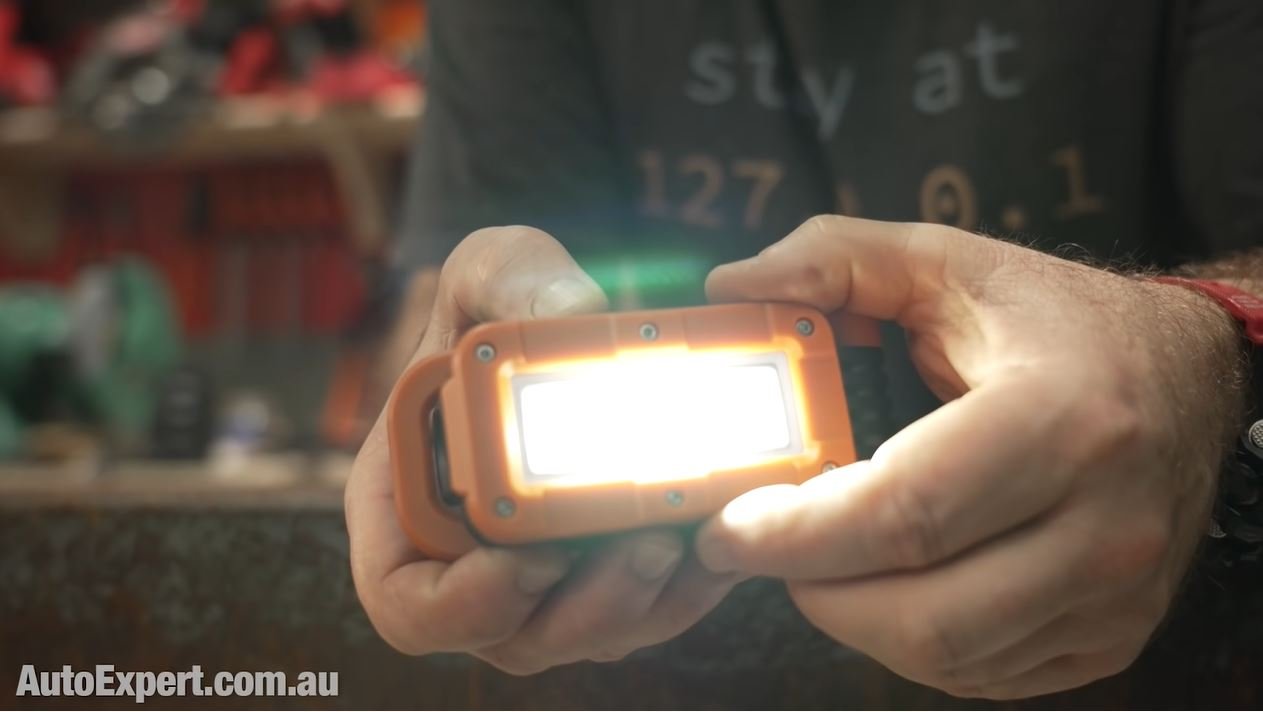
It can be a bit dark and dingy down there, too, and you need to see what’s going on. Even better is having both hands free, at times. So, the options there are something like an Olight Swivel (enter the code AEJC for 10% off) - brilliant versatile work light with a hook and a magnetic base. Or the ‘ghetto’ head torch, which in my case is an Olight Warrior Mini 2 or Baton 3 clipped to the peak of my dome-protecting baseball cap.
Finally, get some safety specs because you’re lying on your back, looking up at a whole bunch of things just itching to jump down into your eyes. Because if they can’t murder you, blinding you is the next-best option. It takes about three seconds to put on safety specs, but blindness is generally for ever. Pro Tip: Wear specs even when climbing a ladder, too.
Next episode, Part II will focus on the general best practice of getting jacked together guidelines, for those who want to make it out alive. It’ll be emotional.
Just remember: What happens under the car, stays under the car until fire and rescue crews arrive. Especially if you get this wrong.


The Kia EV3 is the brand’s entry-level fully electric model and when you take into account its price and the level of equipment, the astounding build quality and segment-leading refinement it offers compelling value. If you want affordable luxury with the daily dependability of an EV, you might be on a winner here…