
How to Make a Brass Hammer at Home (and Why You Actually Want One)
There’s a persistent myth in DIY: “I’d get started… if I just had better tools.”
Such as: a lathe. A mill. A CNC plasma. A boutique welder that costs more than your first car.
That’s mostly nonsense.
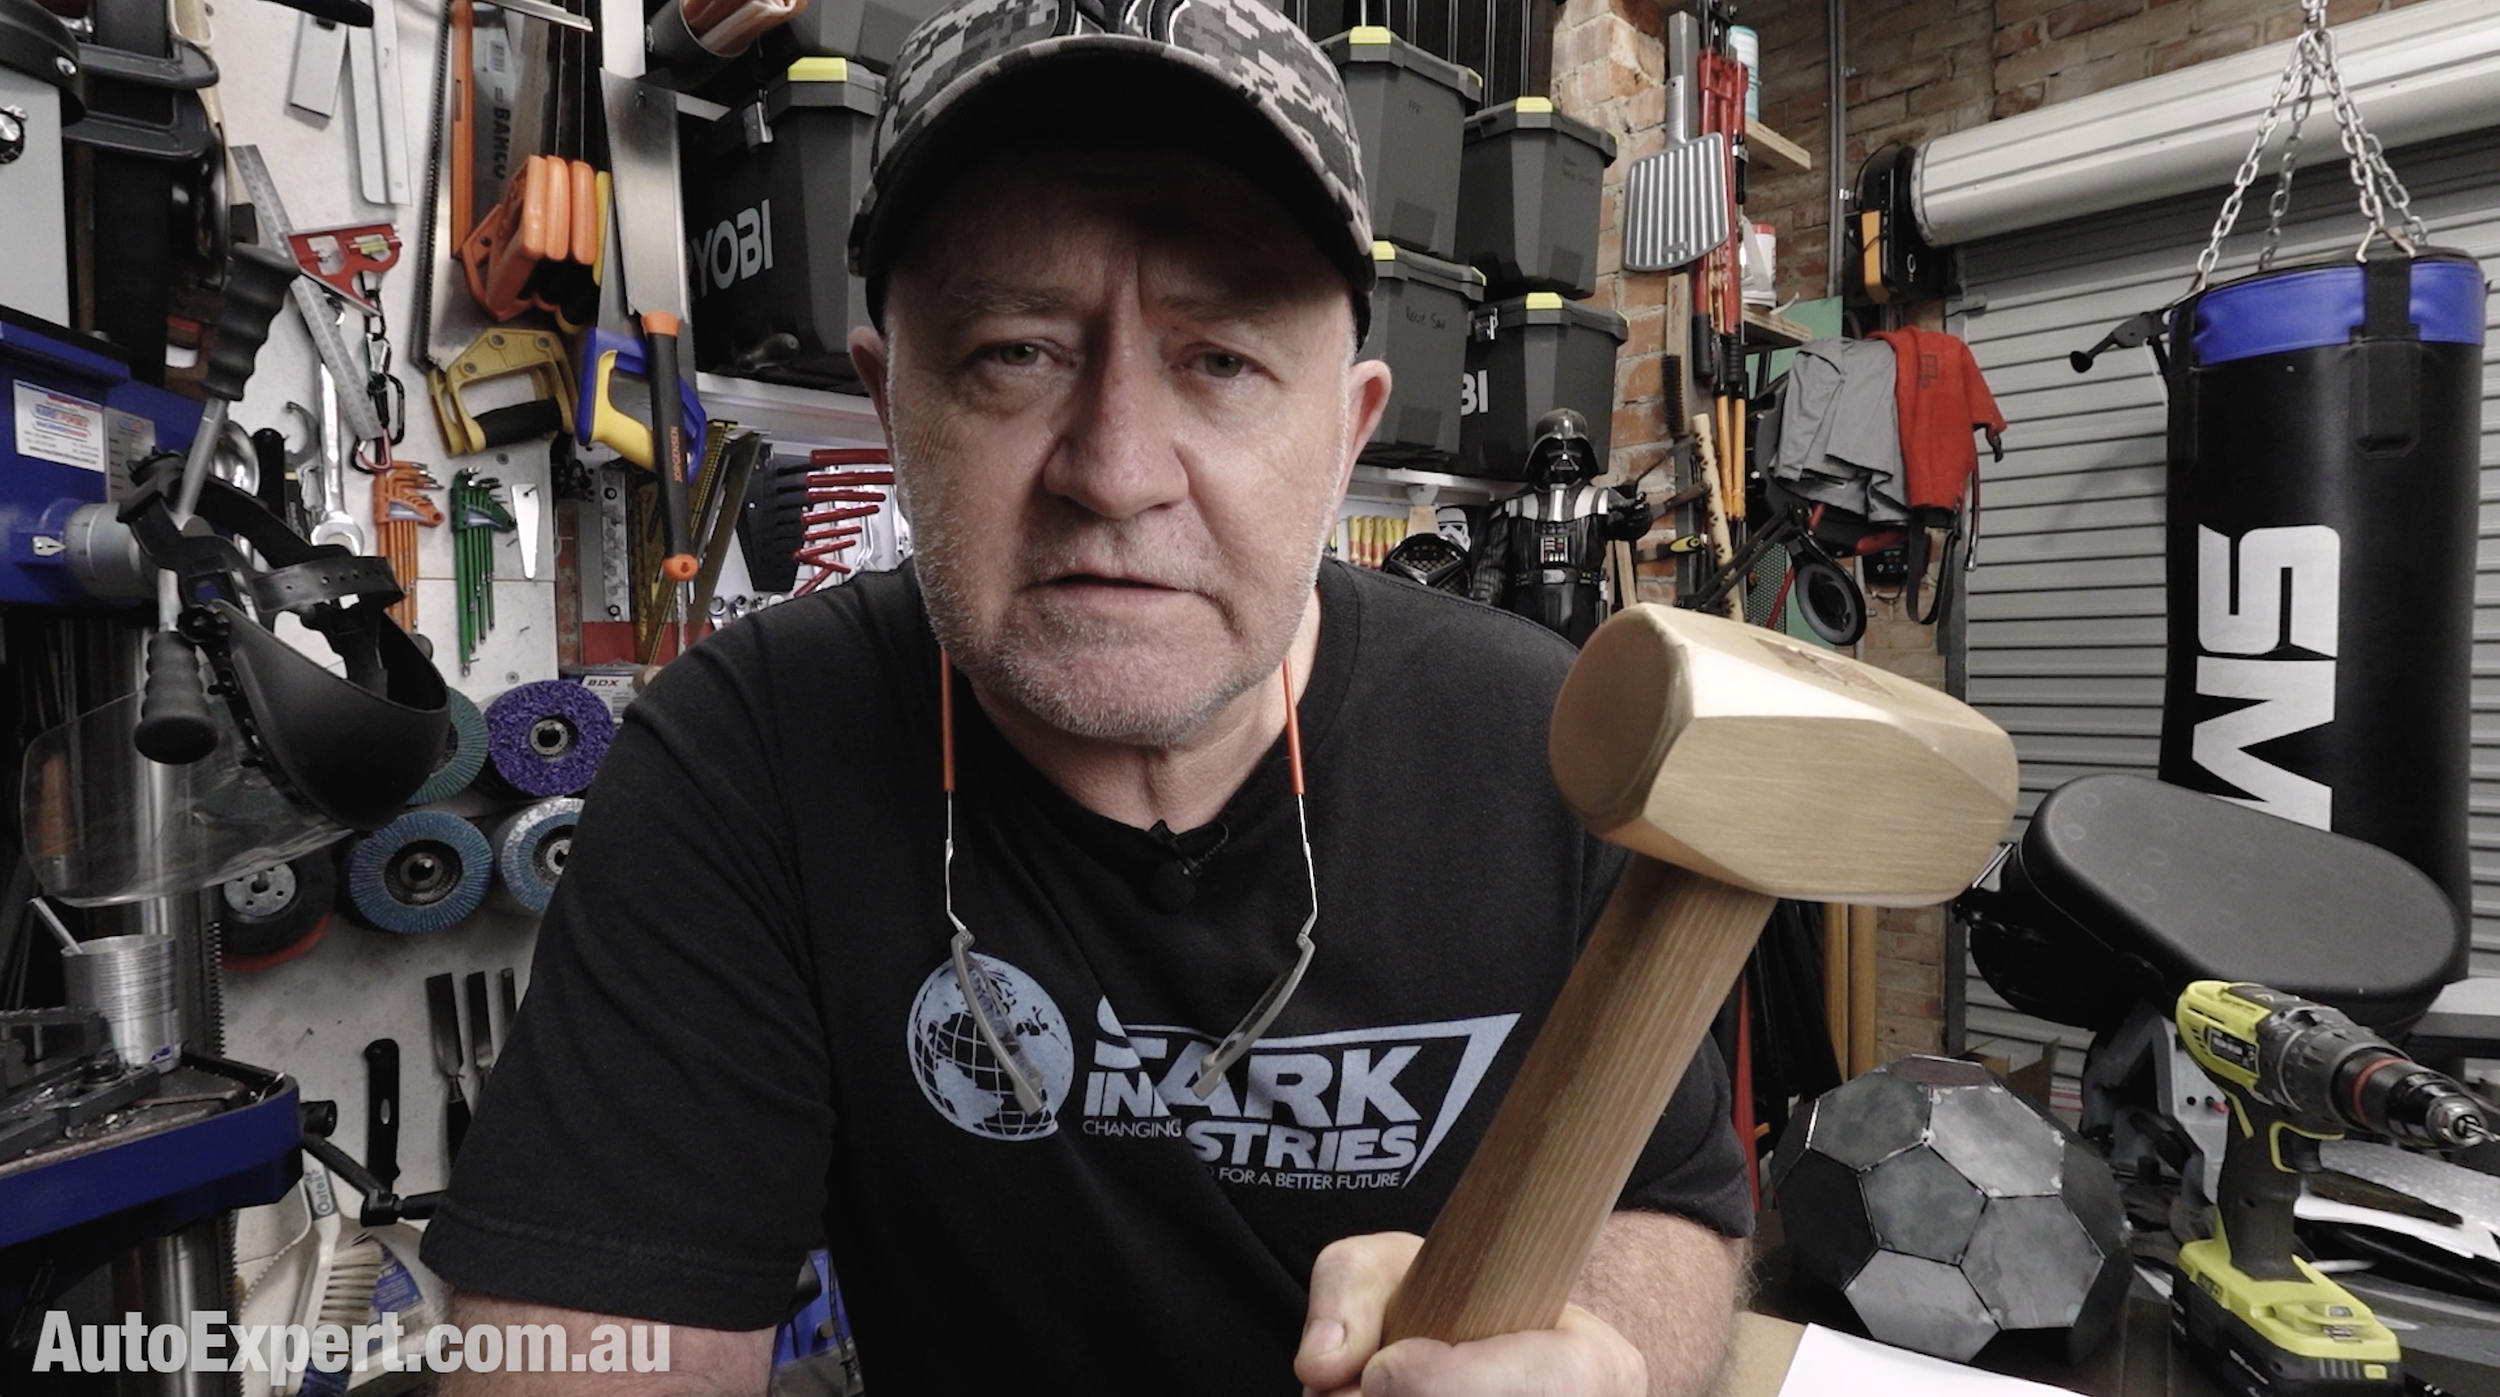
This project is the antidote. It’s also the hammer you’ll reach for every time in the workshop - once you’ve made it. (I made the one below in well under a day.)
I’m not kidding - for mechanical fitting, this is the best hammer you’ll ever use, and an ideal gateway into metalwork (because brass is so satisfying to use in the home workshop).
Watch my video on YouTube instead.
What you’re looking at above is a solid brass hammer you can build at home, from scratch, using basic tools — no machines, no special gear. The raw material will set you back about $50–$60, and the most advanced tool required is a cordless drill.
And when you’re done, you’ll have a tool that’s better suited to a whole class of mechanical work in your shed than any standard steel hammer.
I save people thousands on new cars and home solar - there’s heaps less stress and no obligation in either case. Just help if you want it. New cars here. Home solar here.
Here are the build notes:
Why a Brass Hammer?
Brass is ideal for “sympathetic” mechanical work—jobs where you want force, but not damage.
Use it for:
Persuading spanners without chewing them up
Tapping shafts into bearings
Seating ball joints
Adjusting tack welds on the bench
Straightening small bent components
Panel work (it doubles as a chill bar—weld won’t stick to it)
A brass hammer is a superpower: It doesn’t damage steel parts when you persuade them, it doesn’t spark in flammable environments, and it even has a panel-welding superpower… (Plus, they’re just super-satisfying to use.)
It won’t spark. It won’t mark up steel the way a hardened hammer will. And it has a slightly damped, controlled feel on impact.
Properly made, this is a lifetime tool.
Hammers are a fascinating fundamental tool. Here’s a few interesting resources:
More about brass (Wikipedia)
More on brass hammers and when to use them (Safety Tools)
I save people thousands on new cars and home solar - there’s heaps less stress and no obligation in either case. Just help if you want it. New cars here. Home solar here.
The Concept
I set out to build this hammer using only tools that would fit in a milk crate—tools most DIYers already own.
No lathe. No mill. No shortcuts.
Just marking out, drilling, chiselling, filing, and sanding.
I specifically designed this DIY project so that no special tools are required. The most advanced tool you need is a battery drill (for the handle hole).
Tools You’ll Need
For the head
Combination square
Steel rule
Scriber (or sharpened screwdriver)
Marker
Cordless drill + drill bits
Centre punch
Cold chisel
Hammer
Files
Sandpaper
For the handle
Handsaw
Rasp
Sandpaper
Wood glue
Mallet (or press, if you’ve got one)
A vice is helpful, but clamps will do.
Material Selection
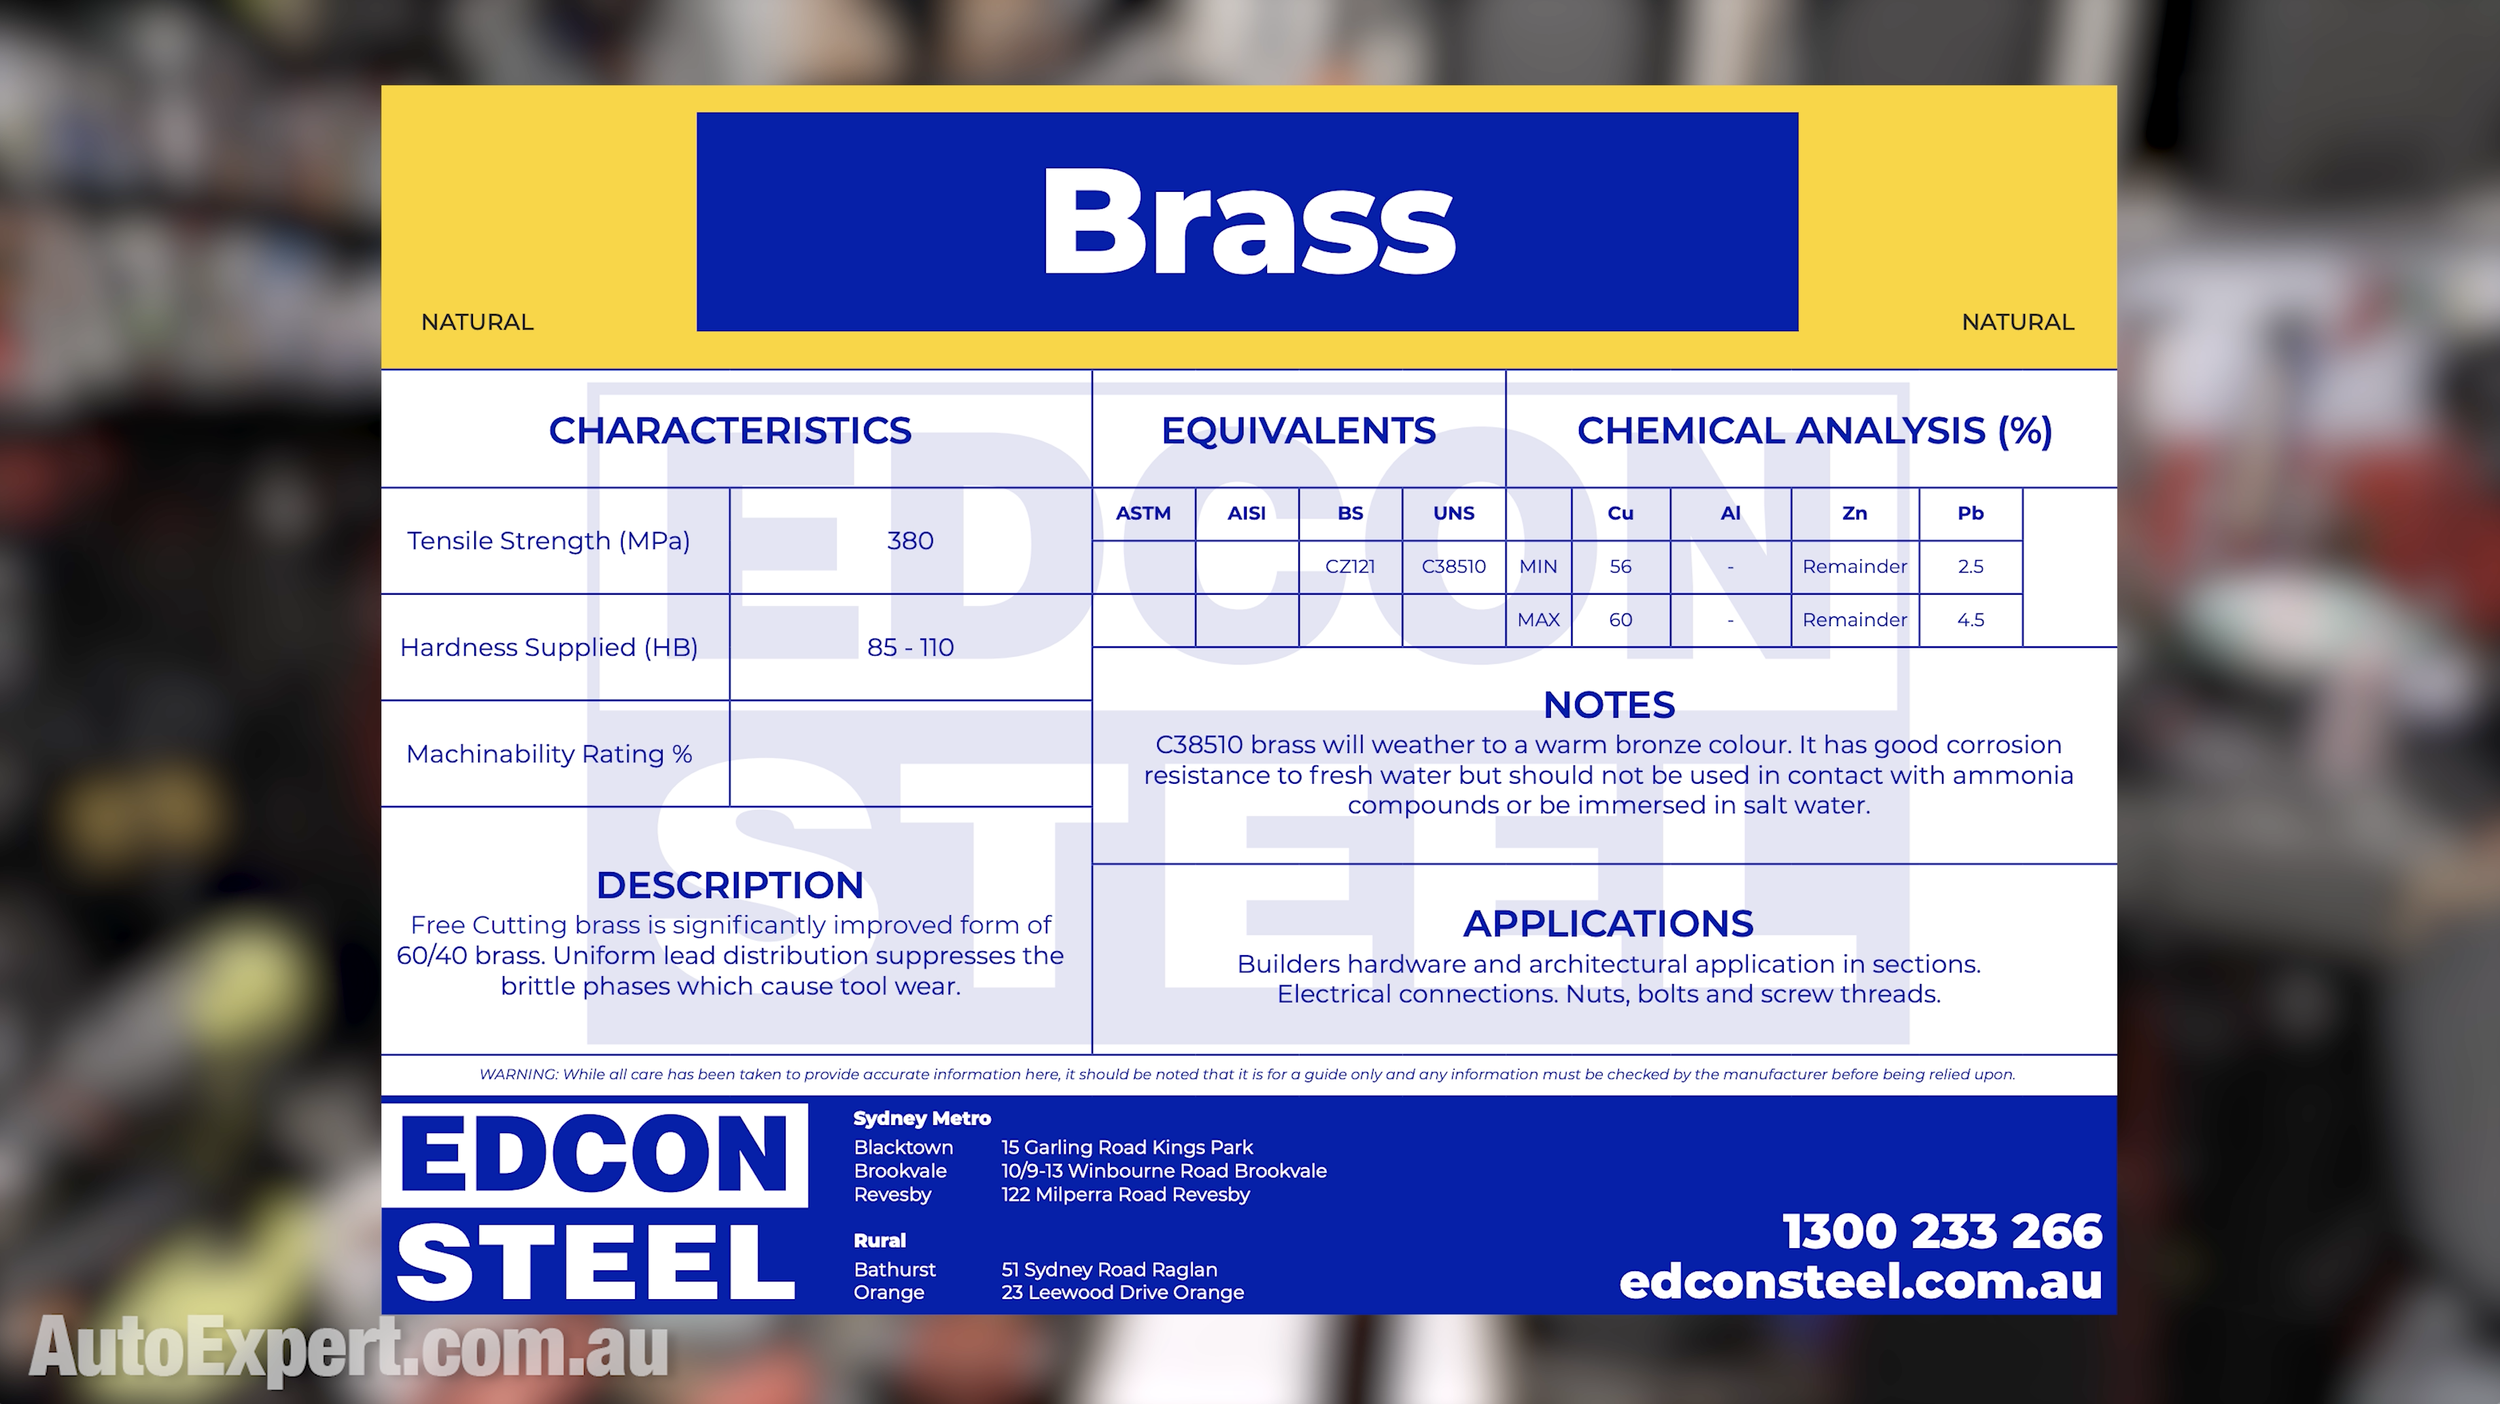
Use C385 brass (free-machining brass).
Composition (approx):
56–60% copper
2.5–4.5% lead
Balance zinc
Everything you always wanted to know about brass, but were afraid to ask…
The lead content makes it easier to machine. Compared to steel, brass is:
More dense
Less tough (it deforms instead of cracking things)
Non-sparking
Pleasantly damped in use
Sizing Options
From a supplier like Edcon Steel (or equivalent):
38.1 mm (1.5") square bar
→ ~1.0 kg finished (at ~85 mm long)
Check it out at Edcon Steel(they’ll cut to length - you don’t have to buy a full length)44.45 mm (1.75") square bar
→ ~1.4 kg finished
Check it out at Edcon Steel (they’ll cut to length - you don’t have to buy a full length)
Either works. Bigger gives you more authority; smaller is more nimble.
I save people thousands on new cars and home solar - there’s heaps less stress and no obligation in either case. Just help if you want it. New cars here. Home solar here.
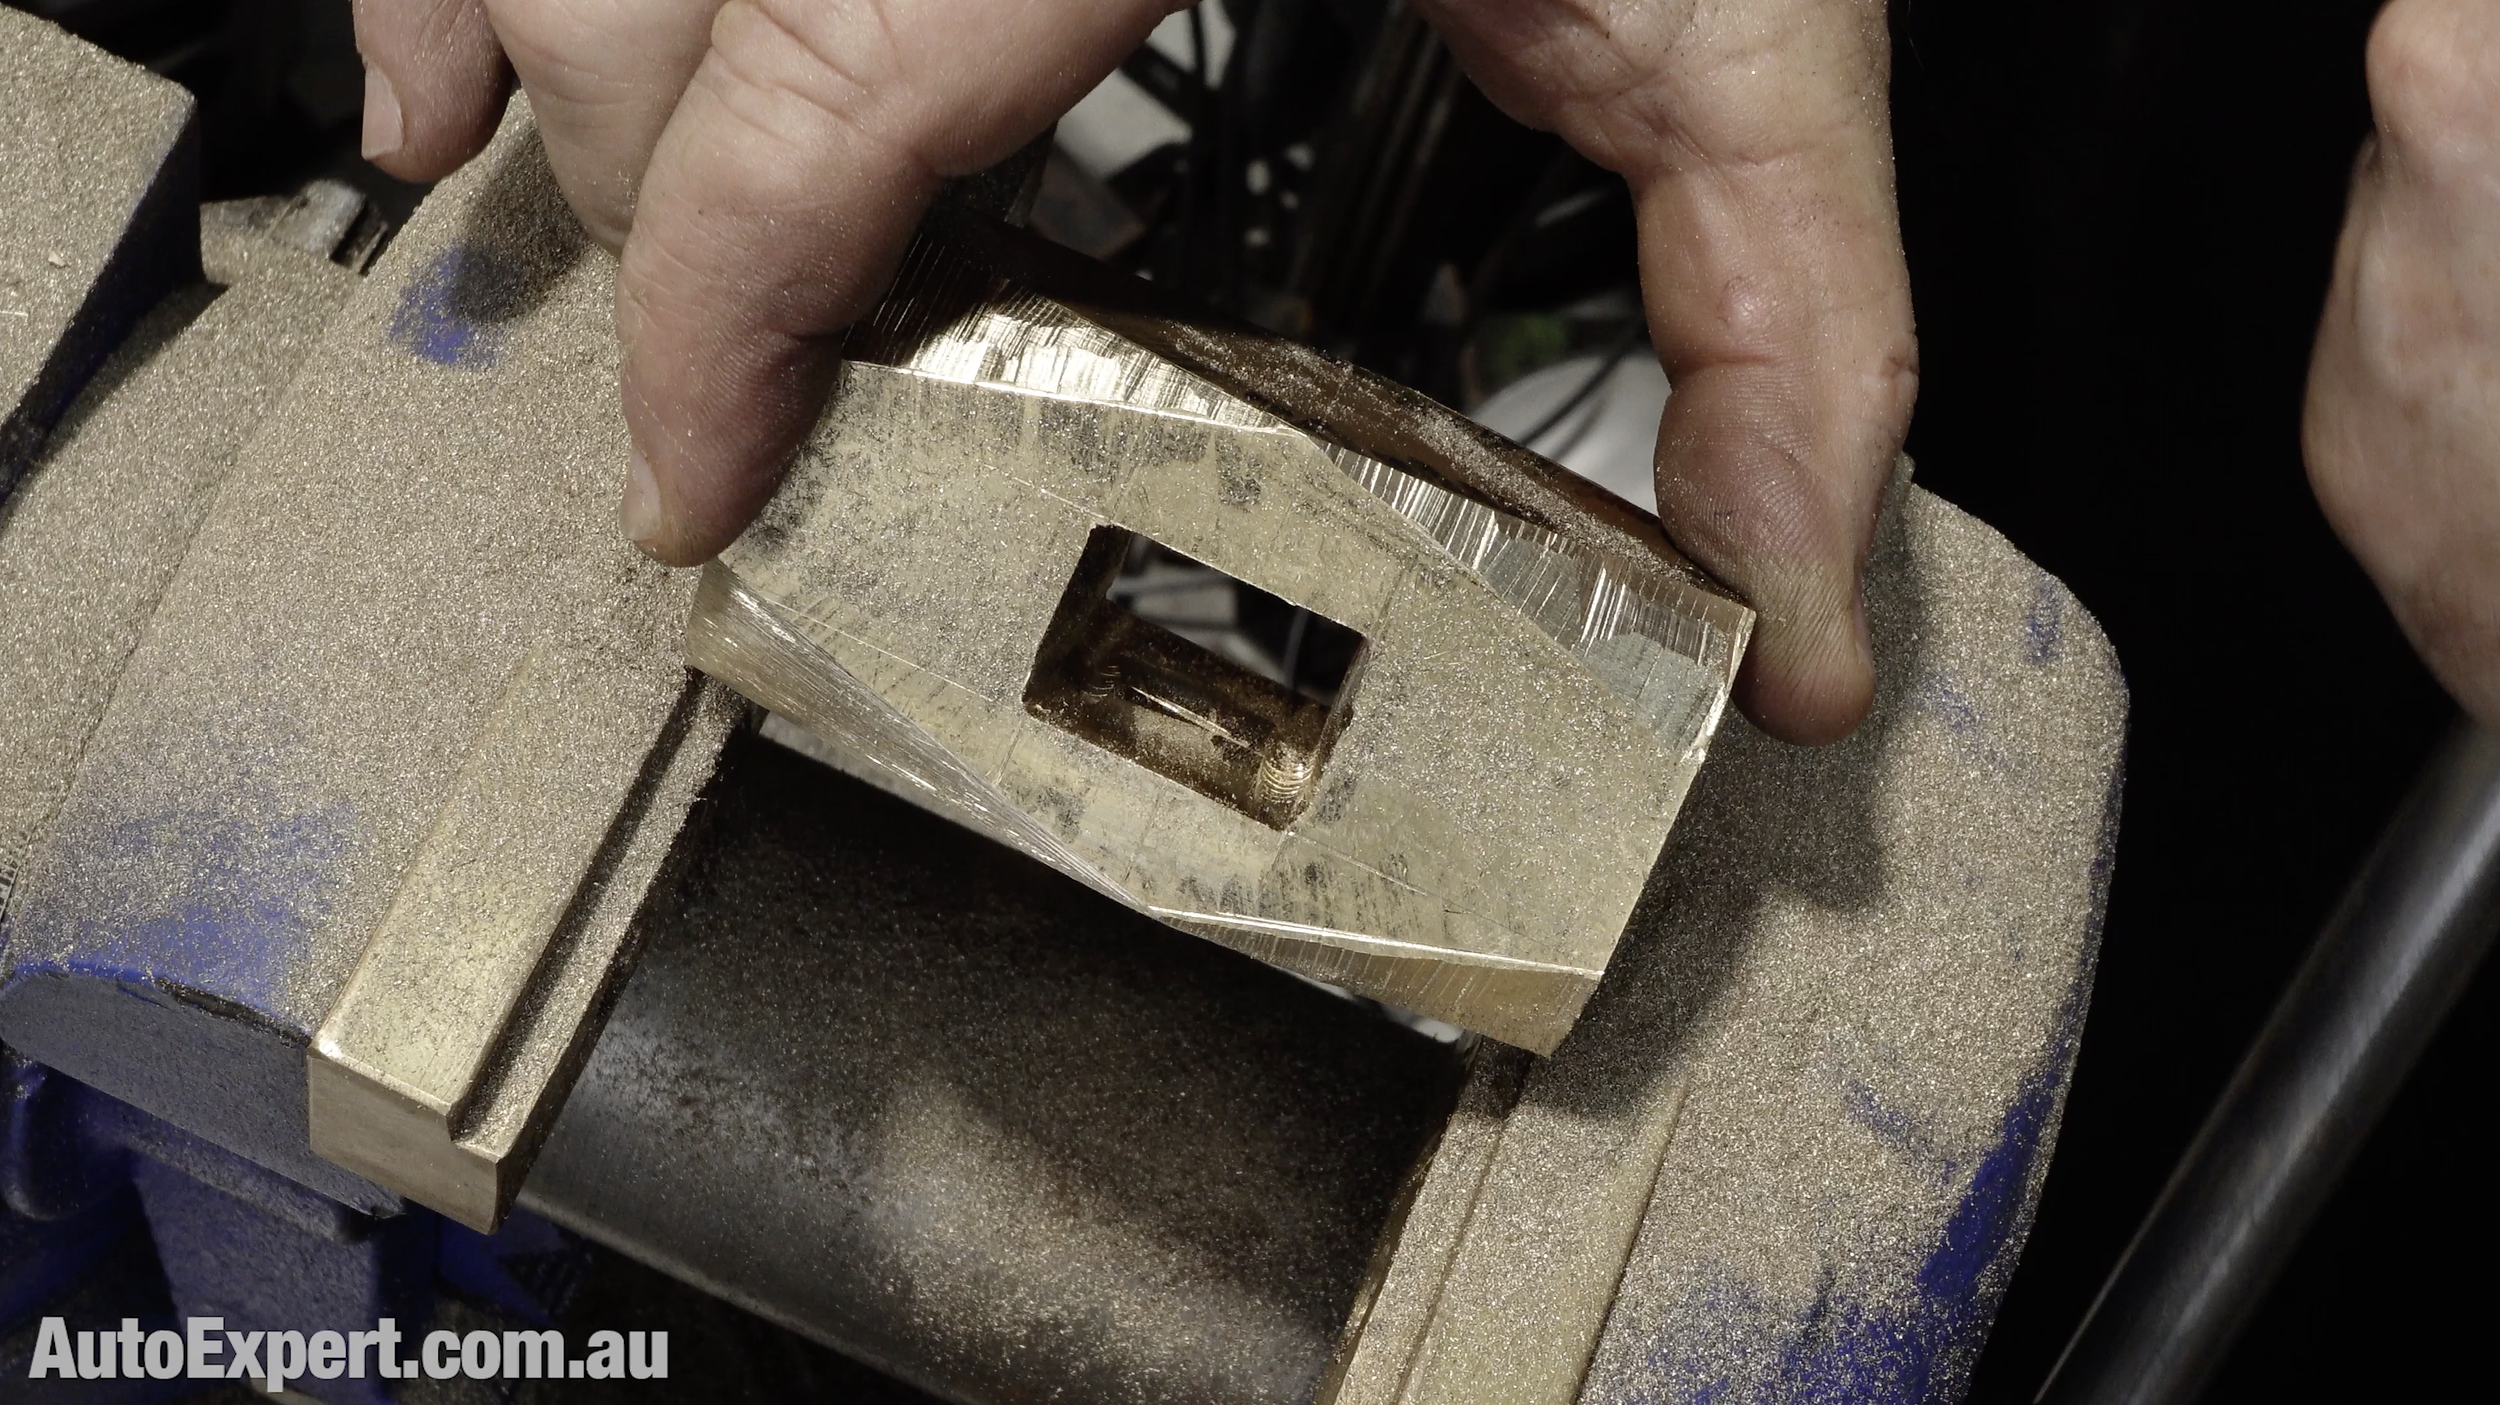
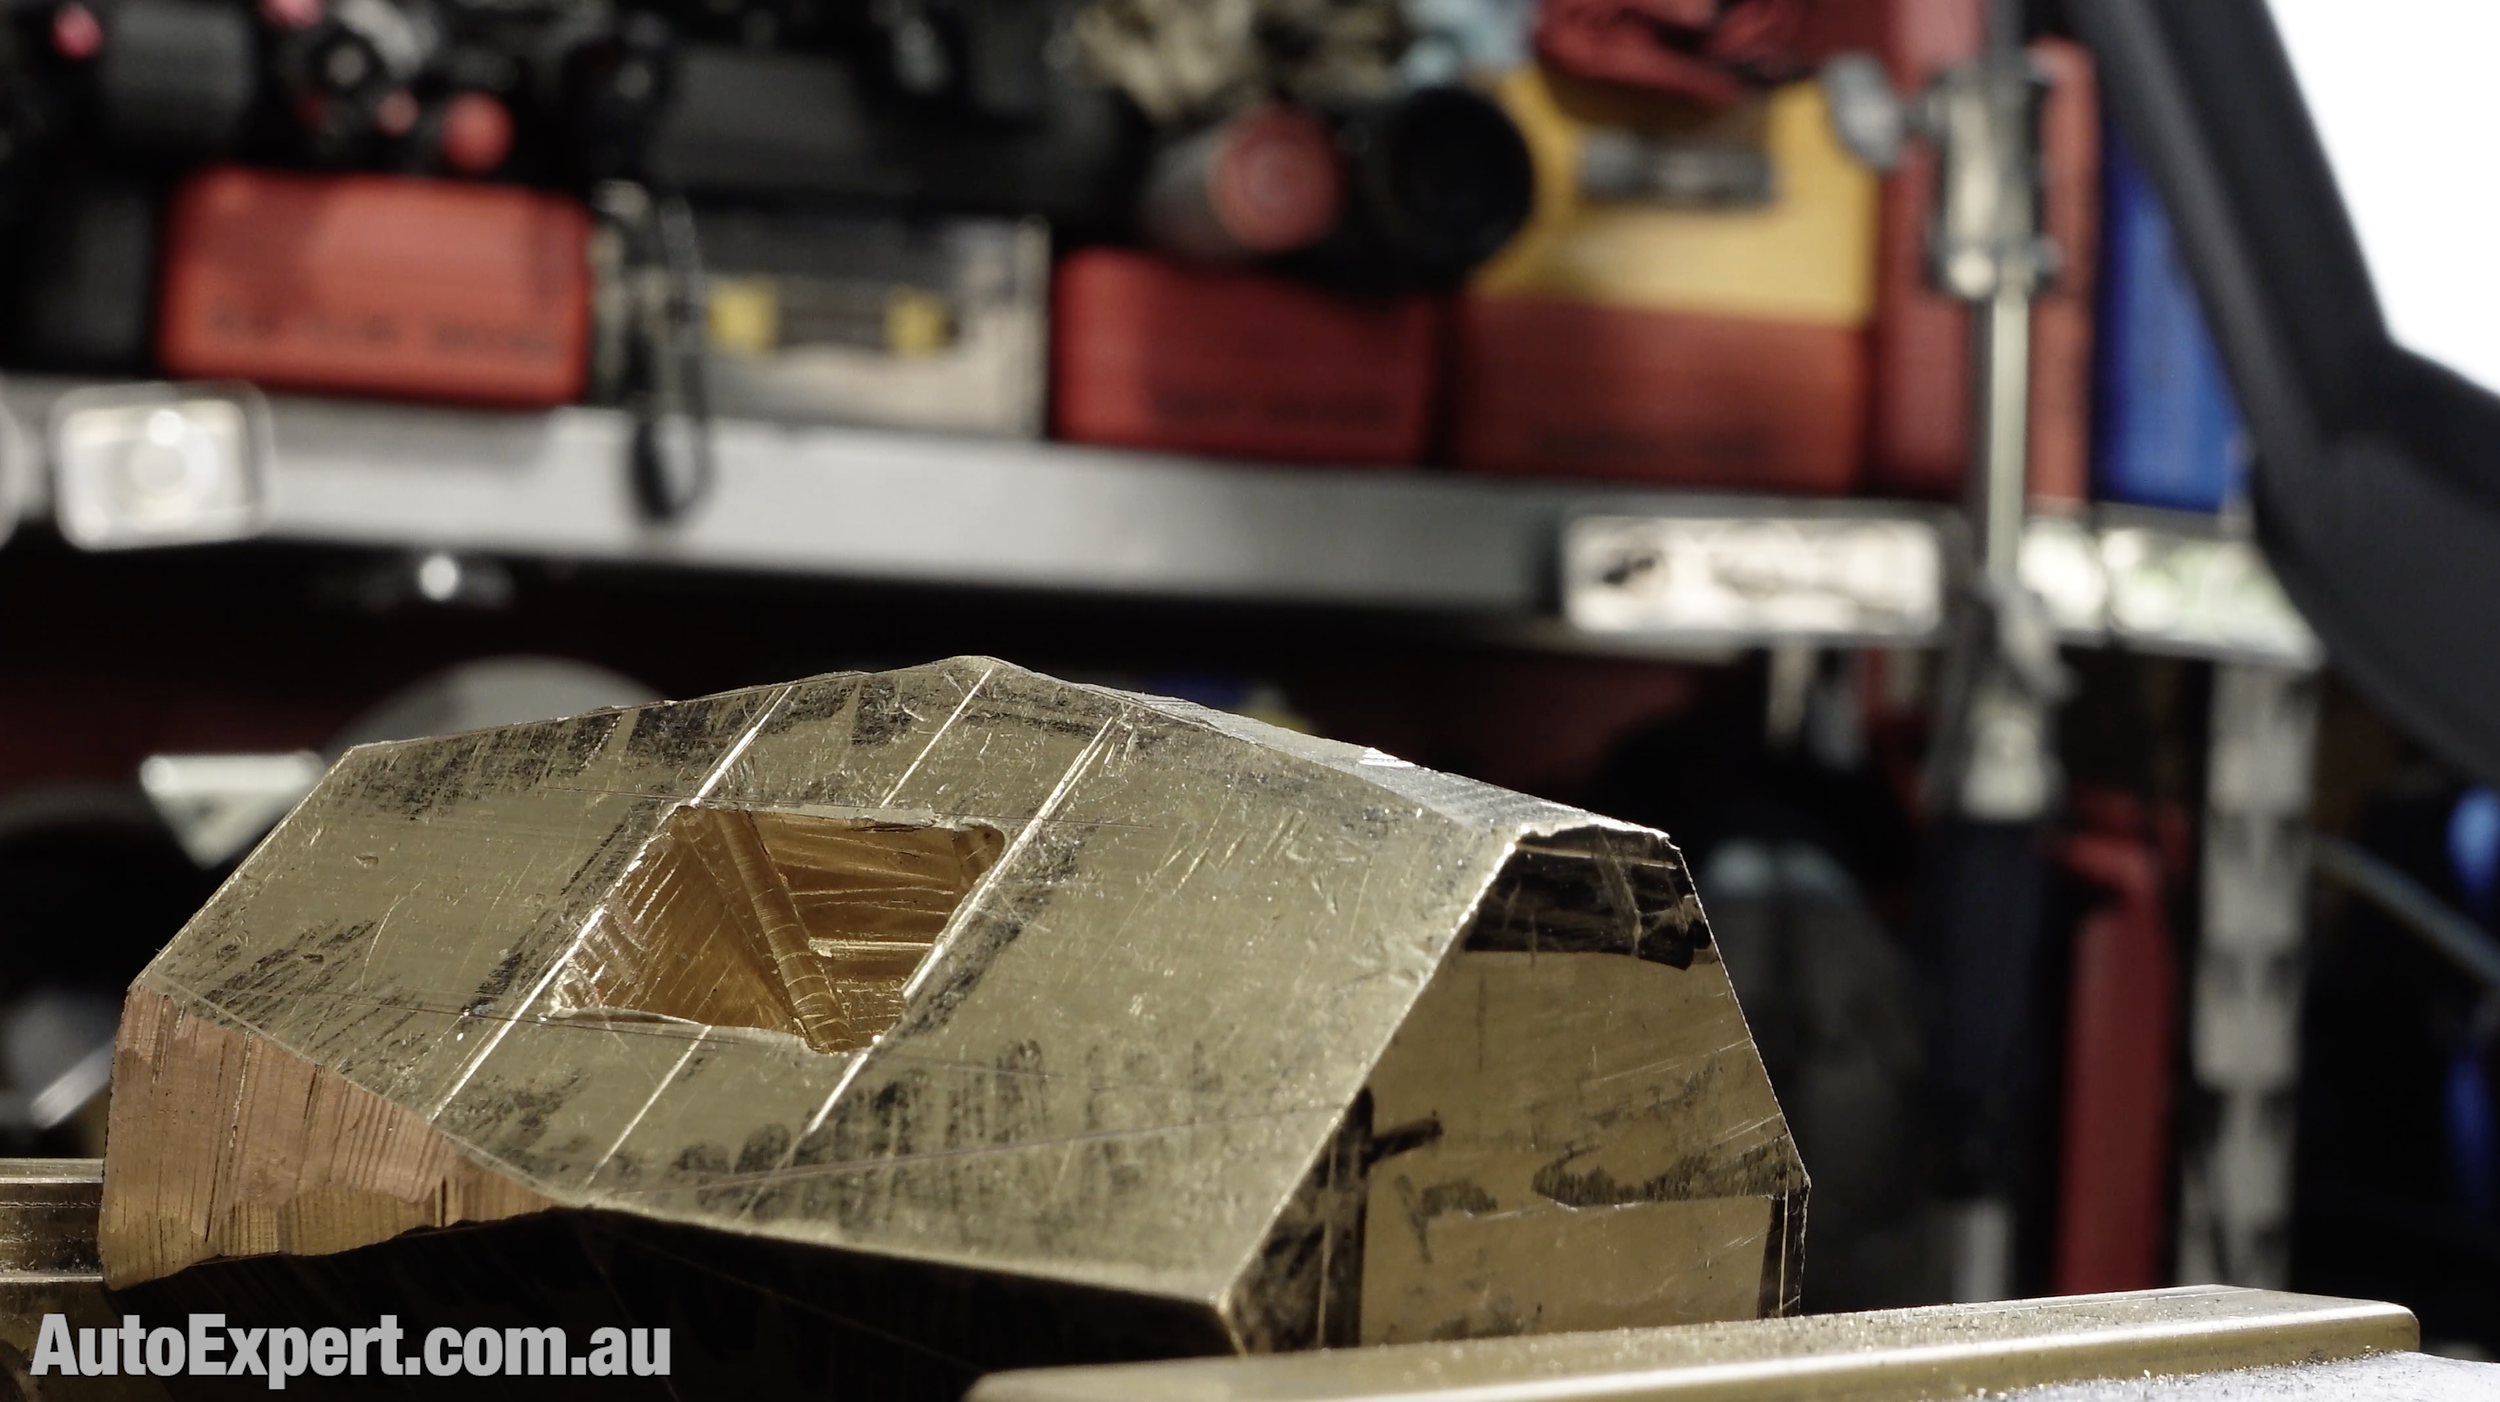
Marking Out the Handle Hole
The handle eye is a rectangular mortice:
16 mm × 24 mm
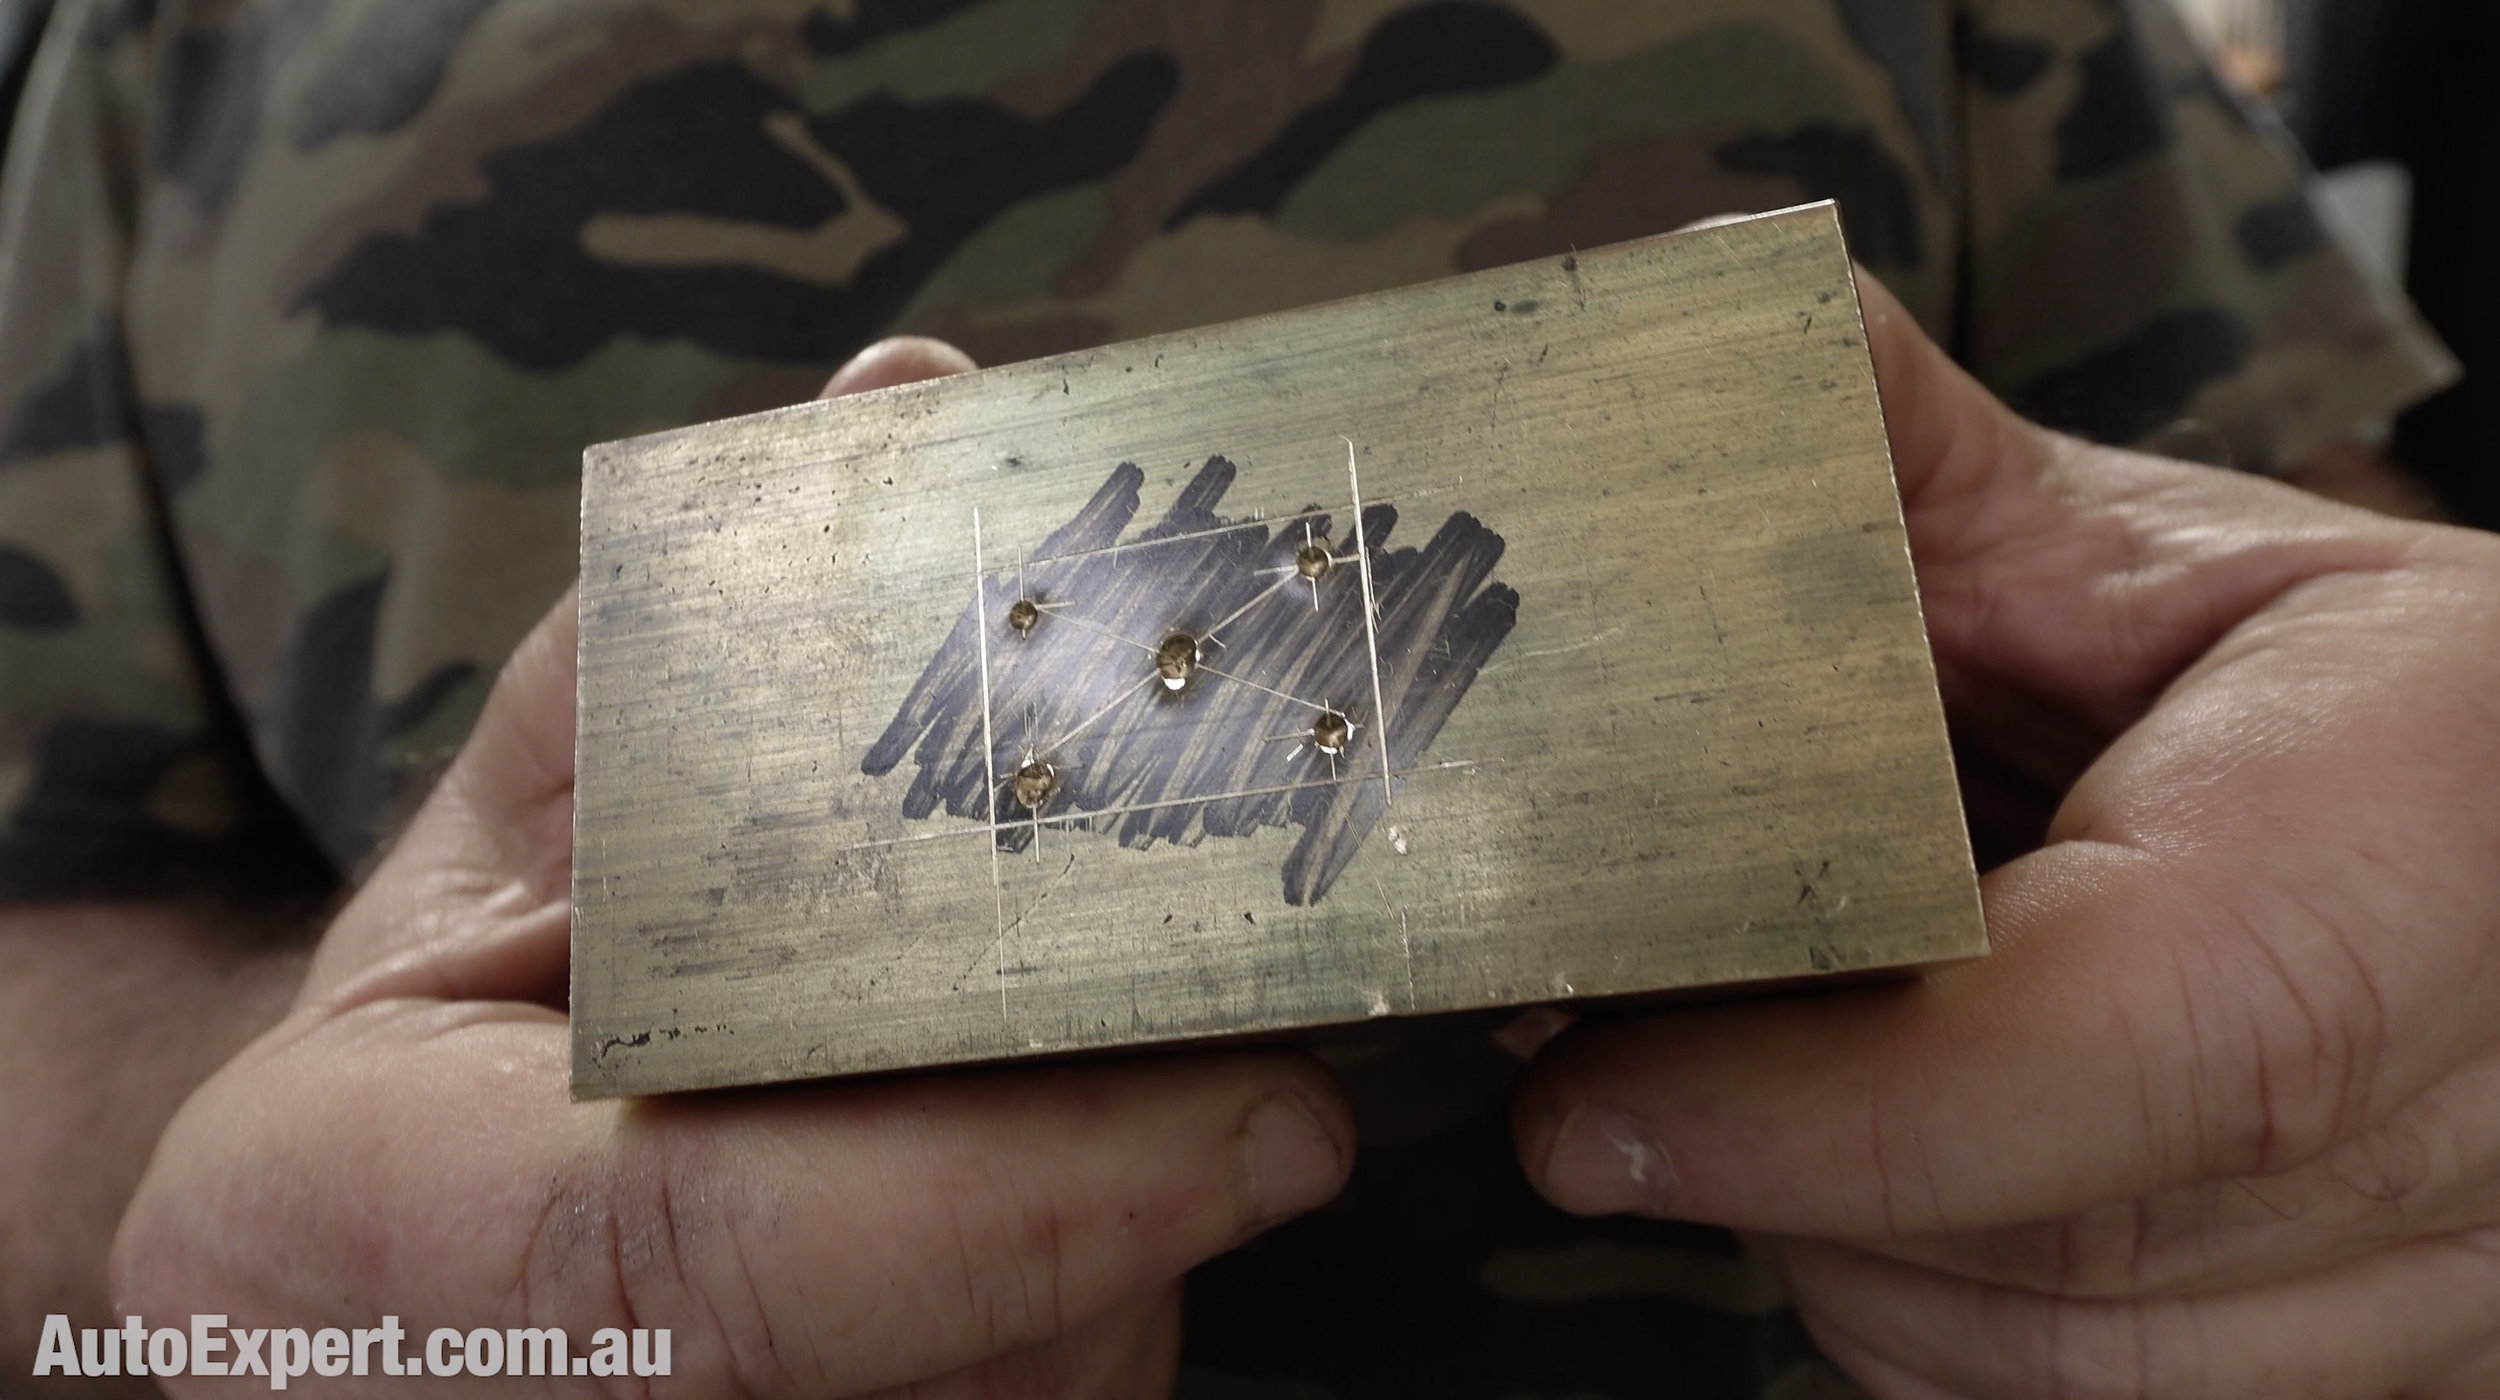
Just drill out as much of the handle hole as you can with a battery drill (come in from each end) and then chisel the rest. Aim for an hourglass internal shape to give the handle some grip.
Start from a reference edge (because your stock won’t be perfectly square).
Steps:
Mark the top of the hole
Transfer that layout to the opposite face using a square
Scribe clean lines (marker + scriber works well)
Accuracy here pays off later.
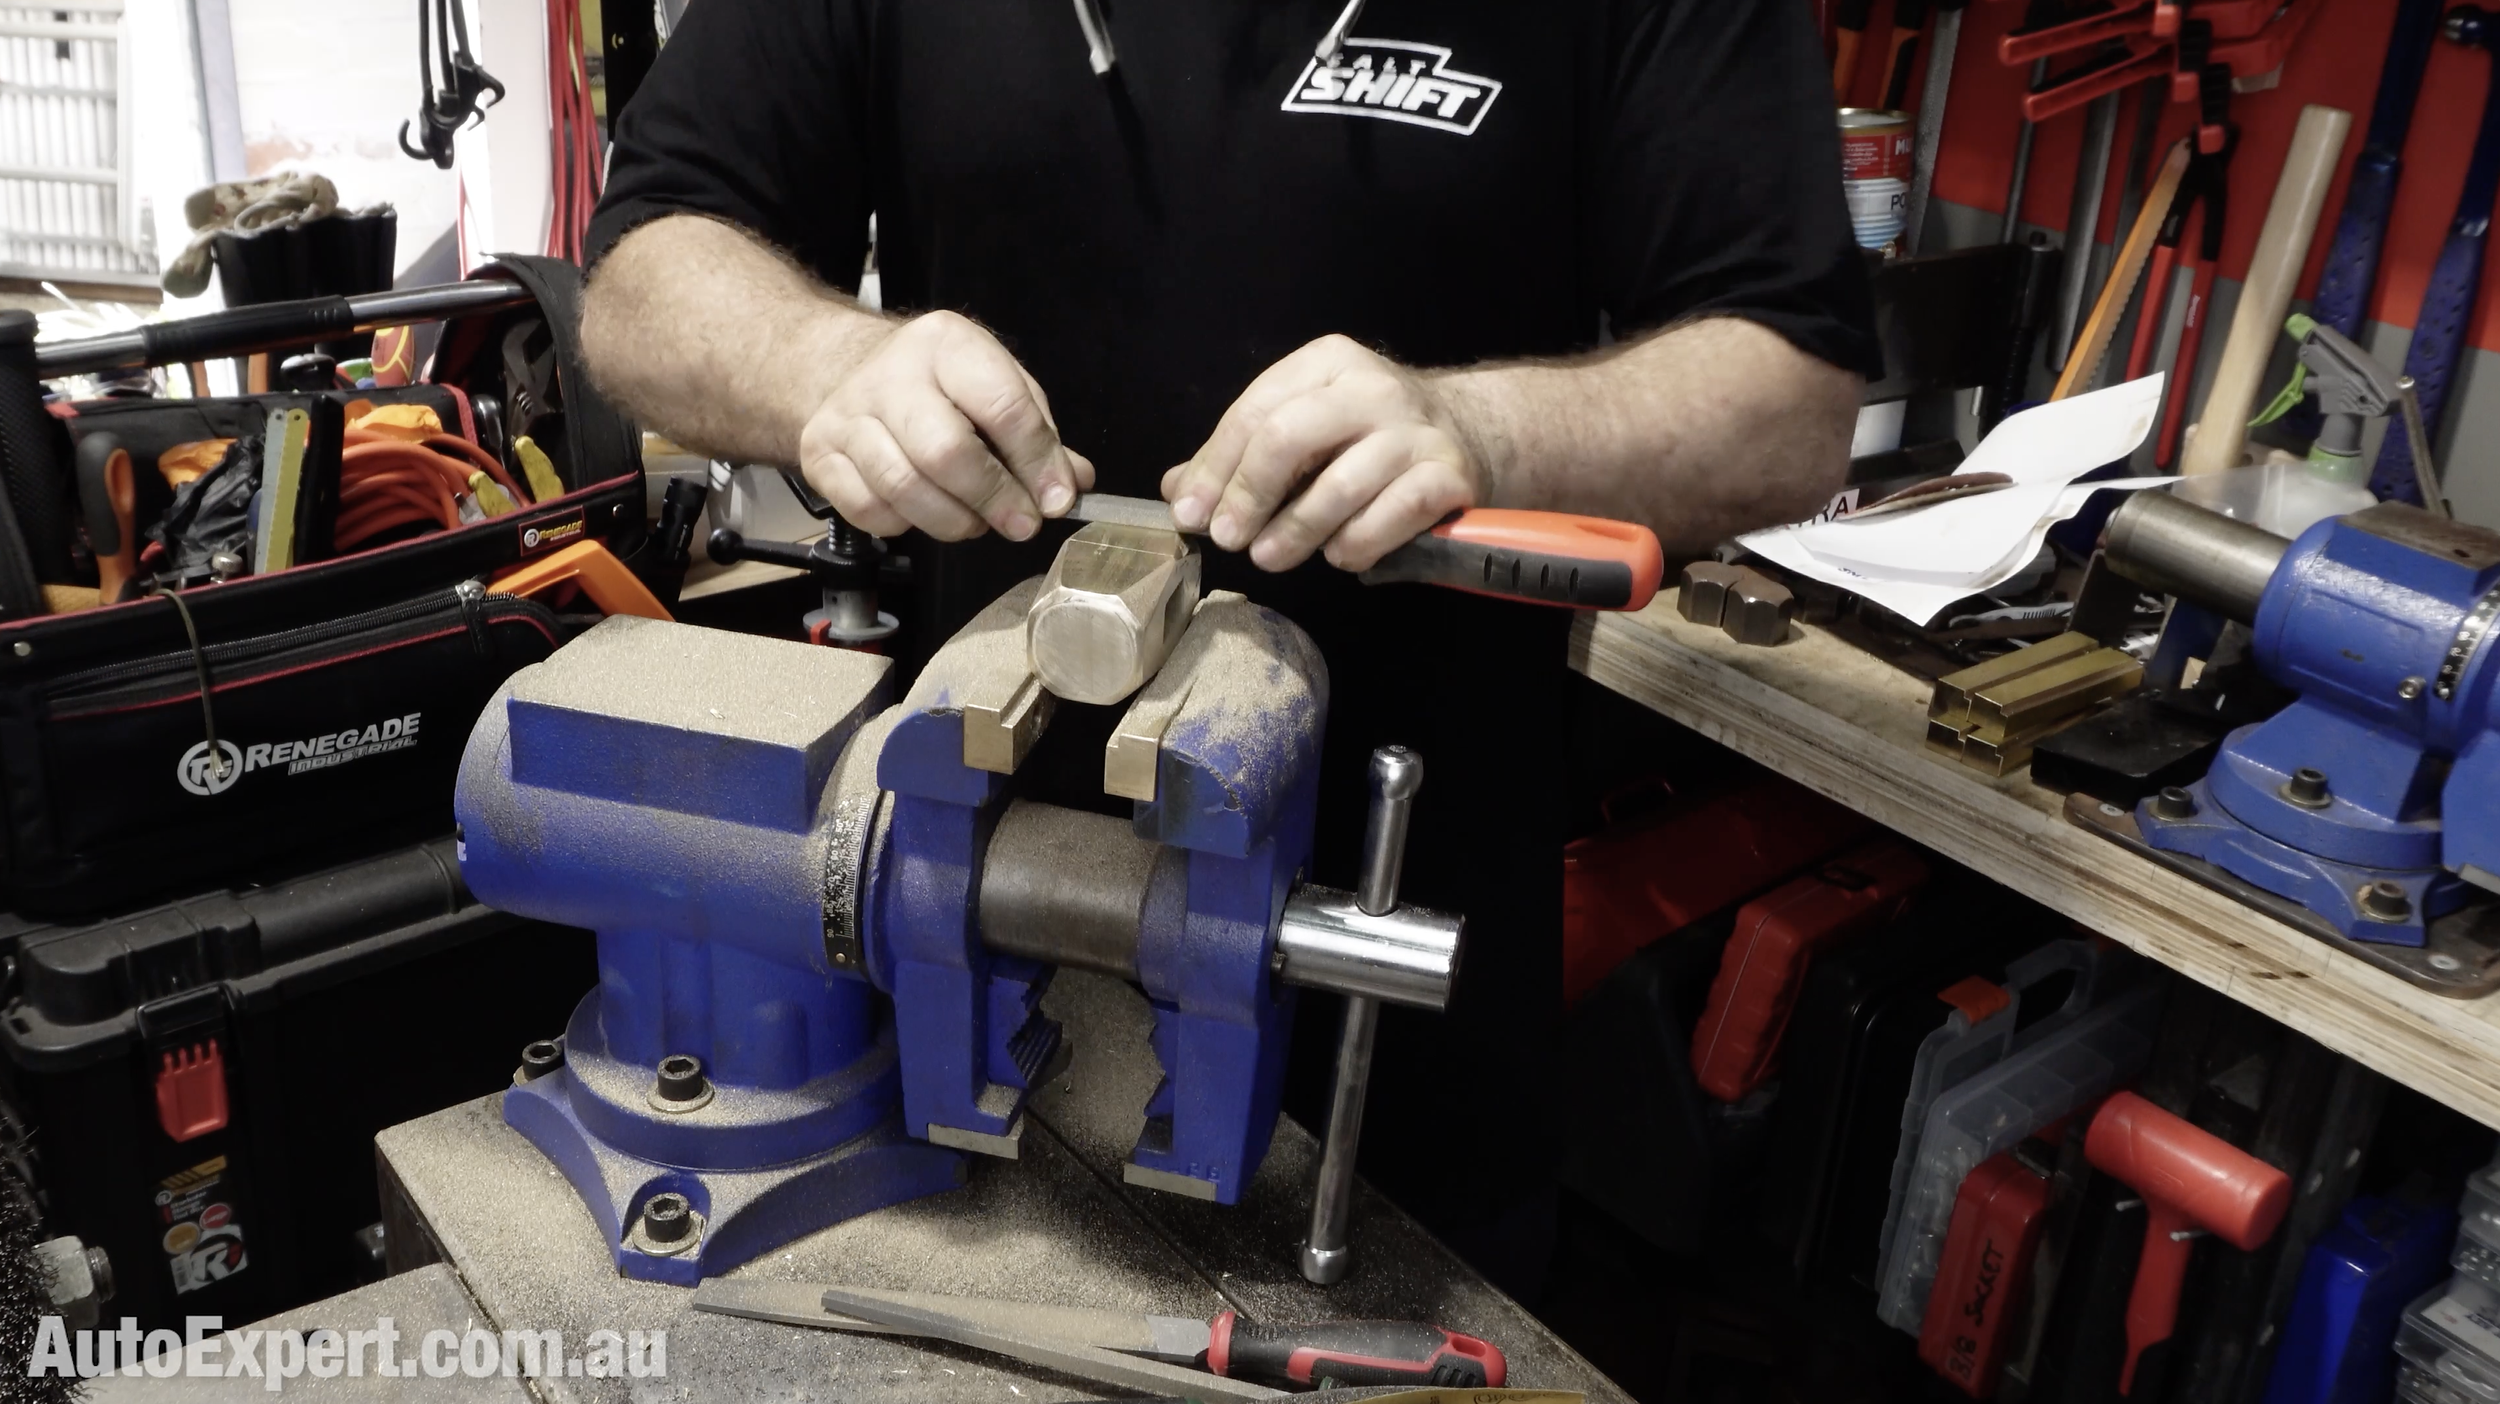
Marking the Head Geometry
The head transitions from square → octagon → round.
This is done with chamfered facets (technically a frustum between faces).
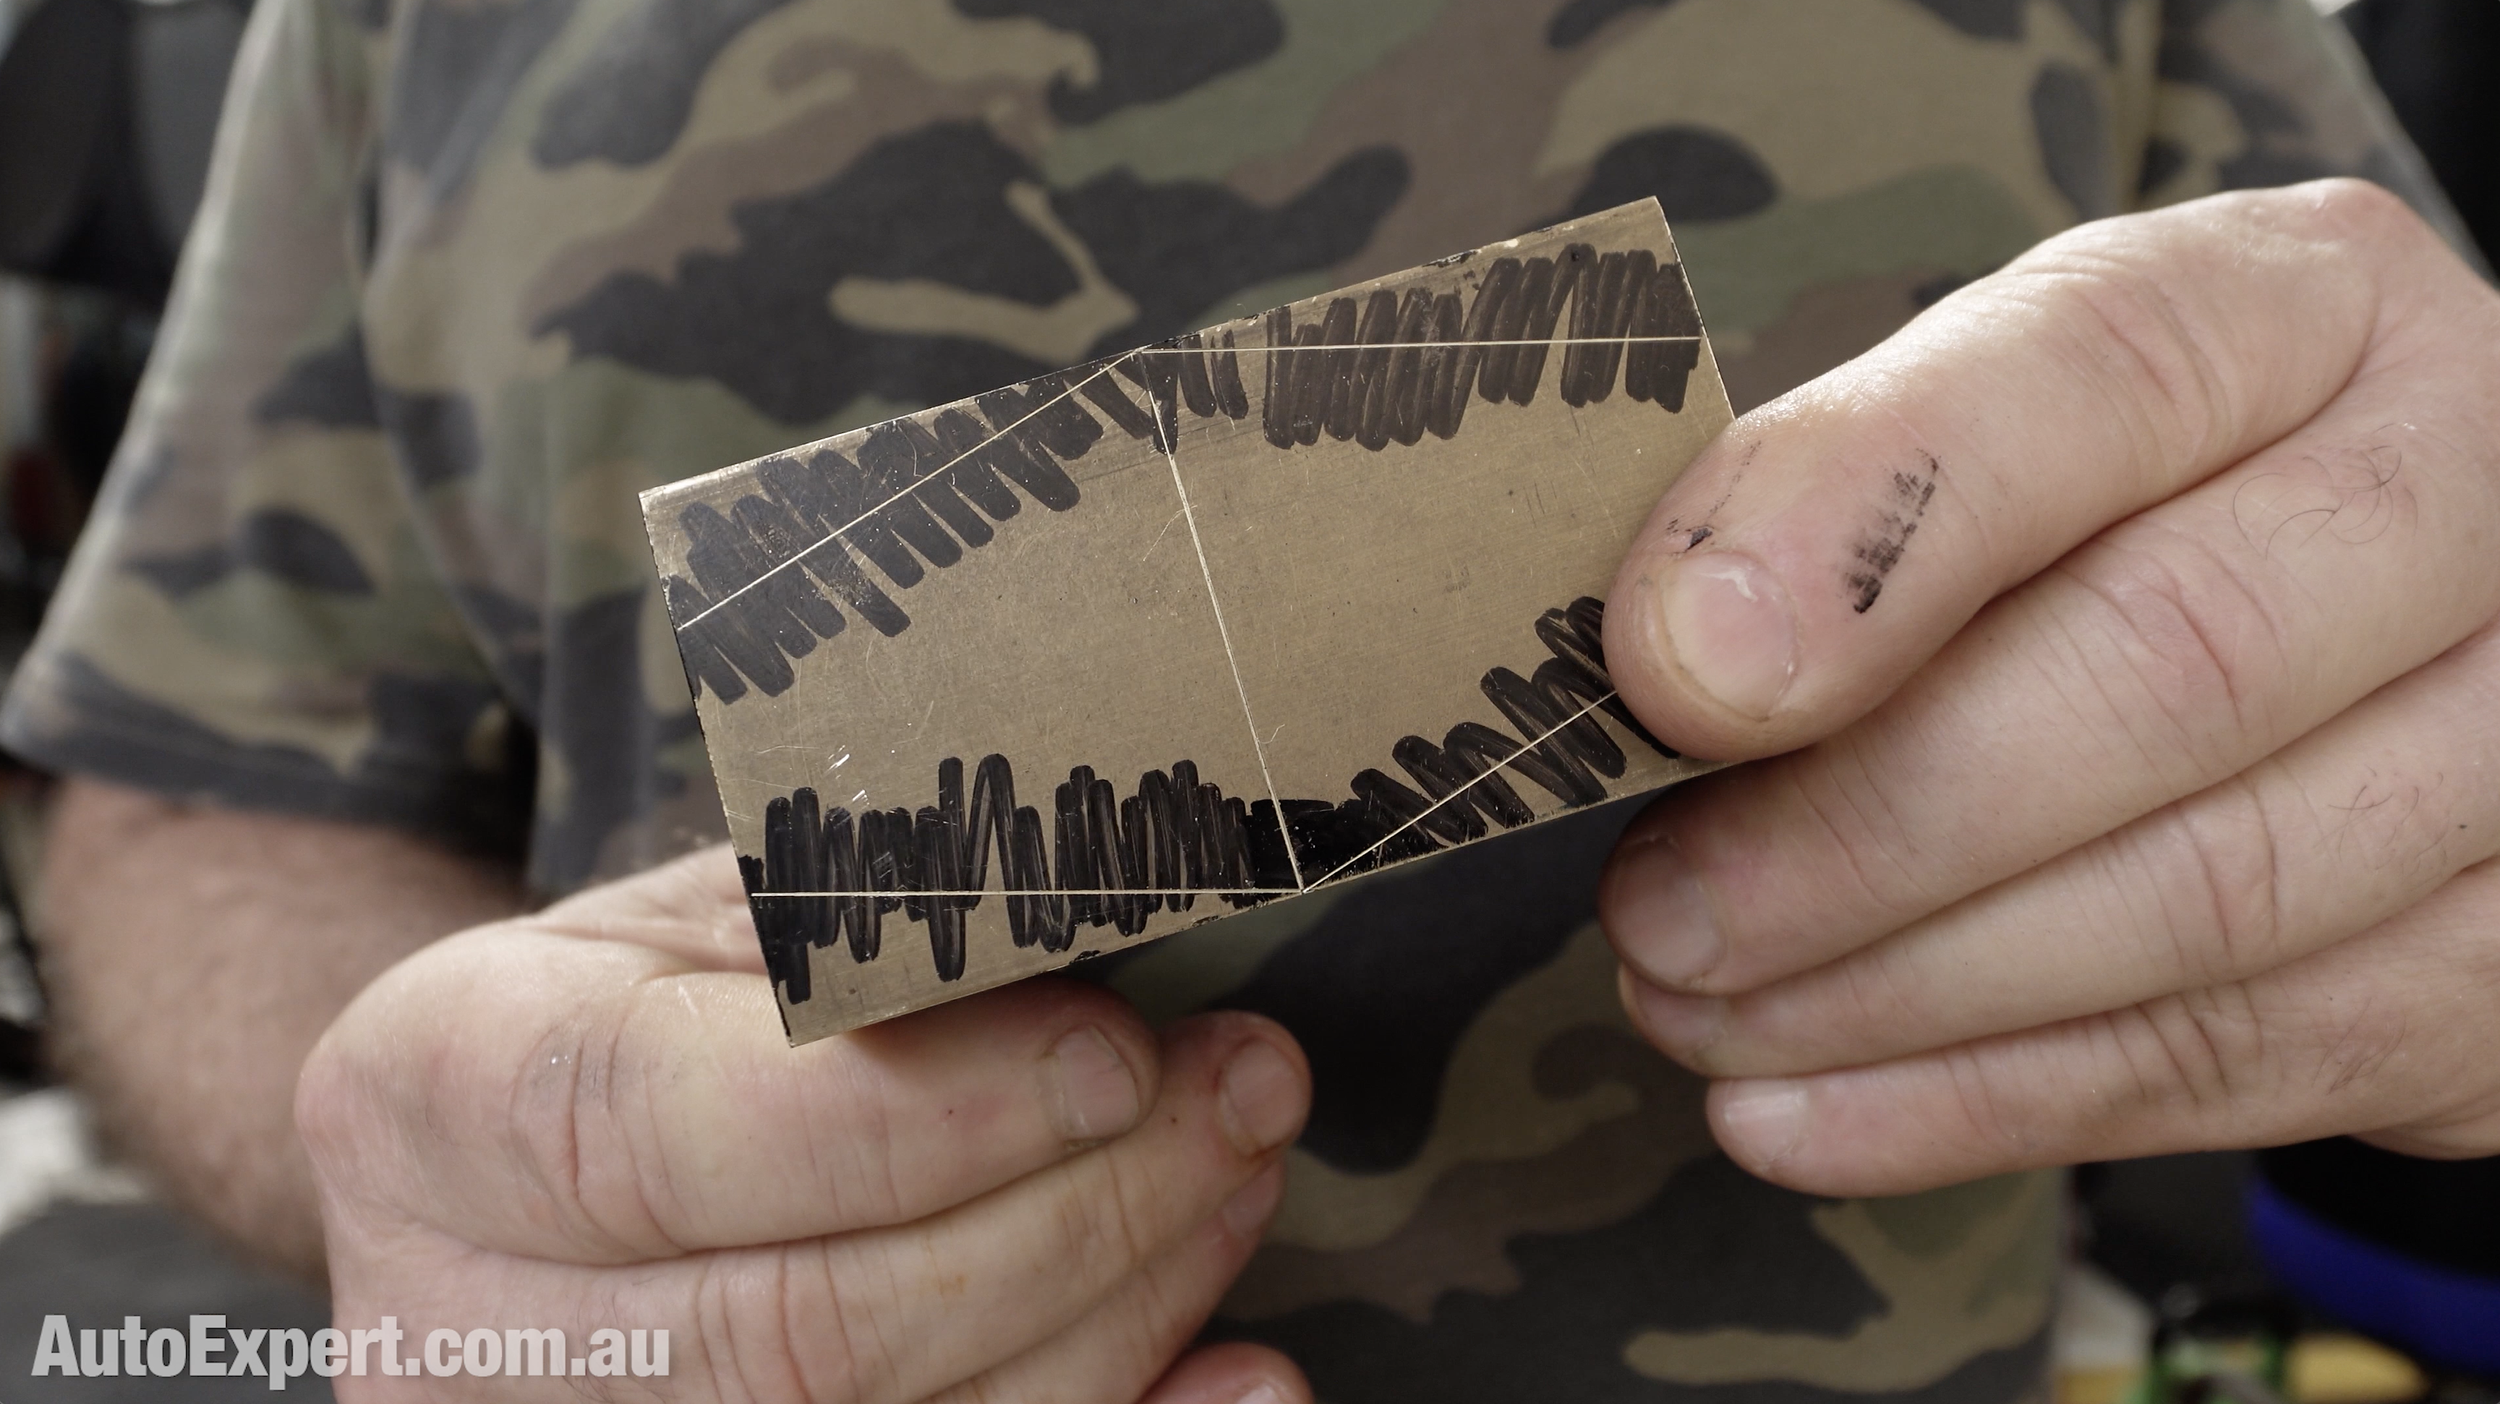
The facets are easy - you’re just transitioning a square section into an octagon by slicing the corners away.
Offsets:
38 mm stock → 11 mm offset
44.5 mm stock → ~12–13 mm offset
You’ll mark out 16 facet transitions in total.
Yes, it’s repetitive. Do it properly anyway.
Cutting the Handle Mortice
This is the most “manual labour” part of the build.
Step 1: Drill the Corners
Drill from both sides
Meet in the middle
Step 2: Remove the Bulk
Chain-drill the interior
Open it up enough to get a chisel in
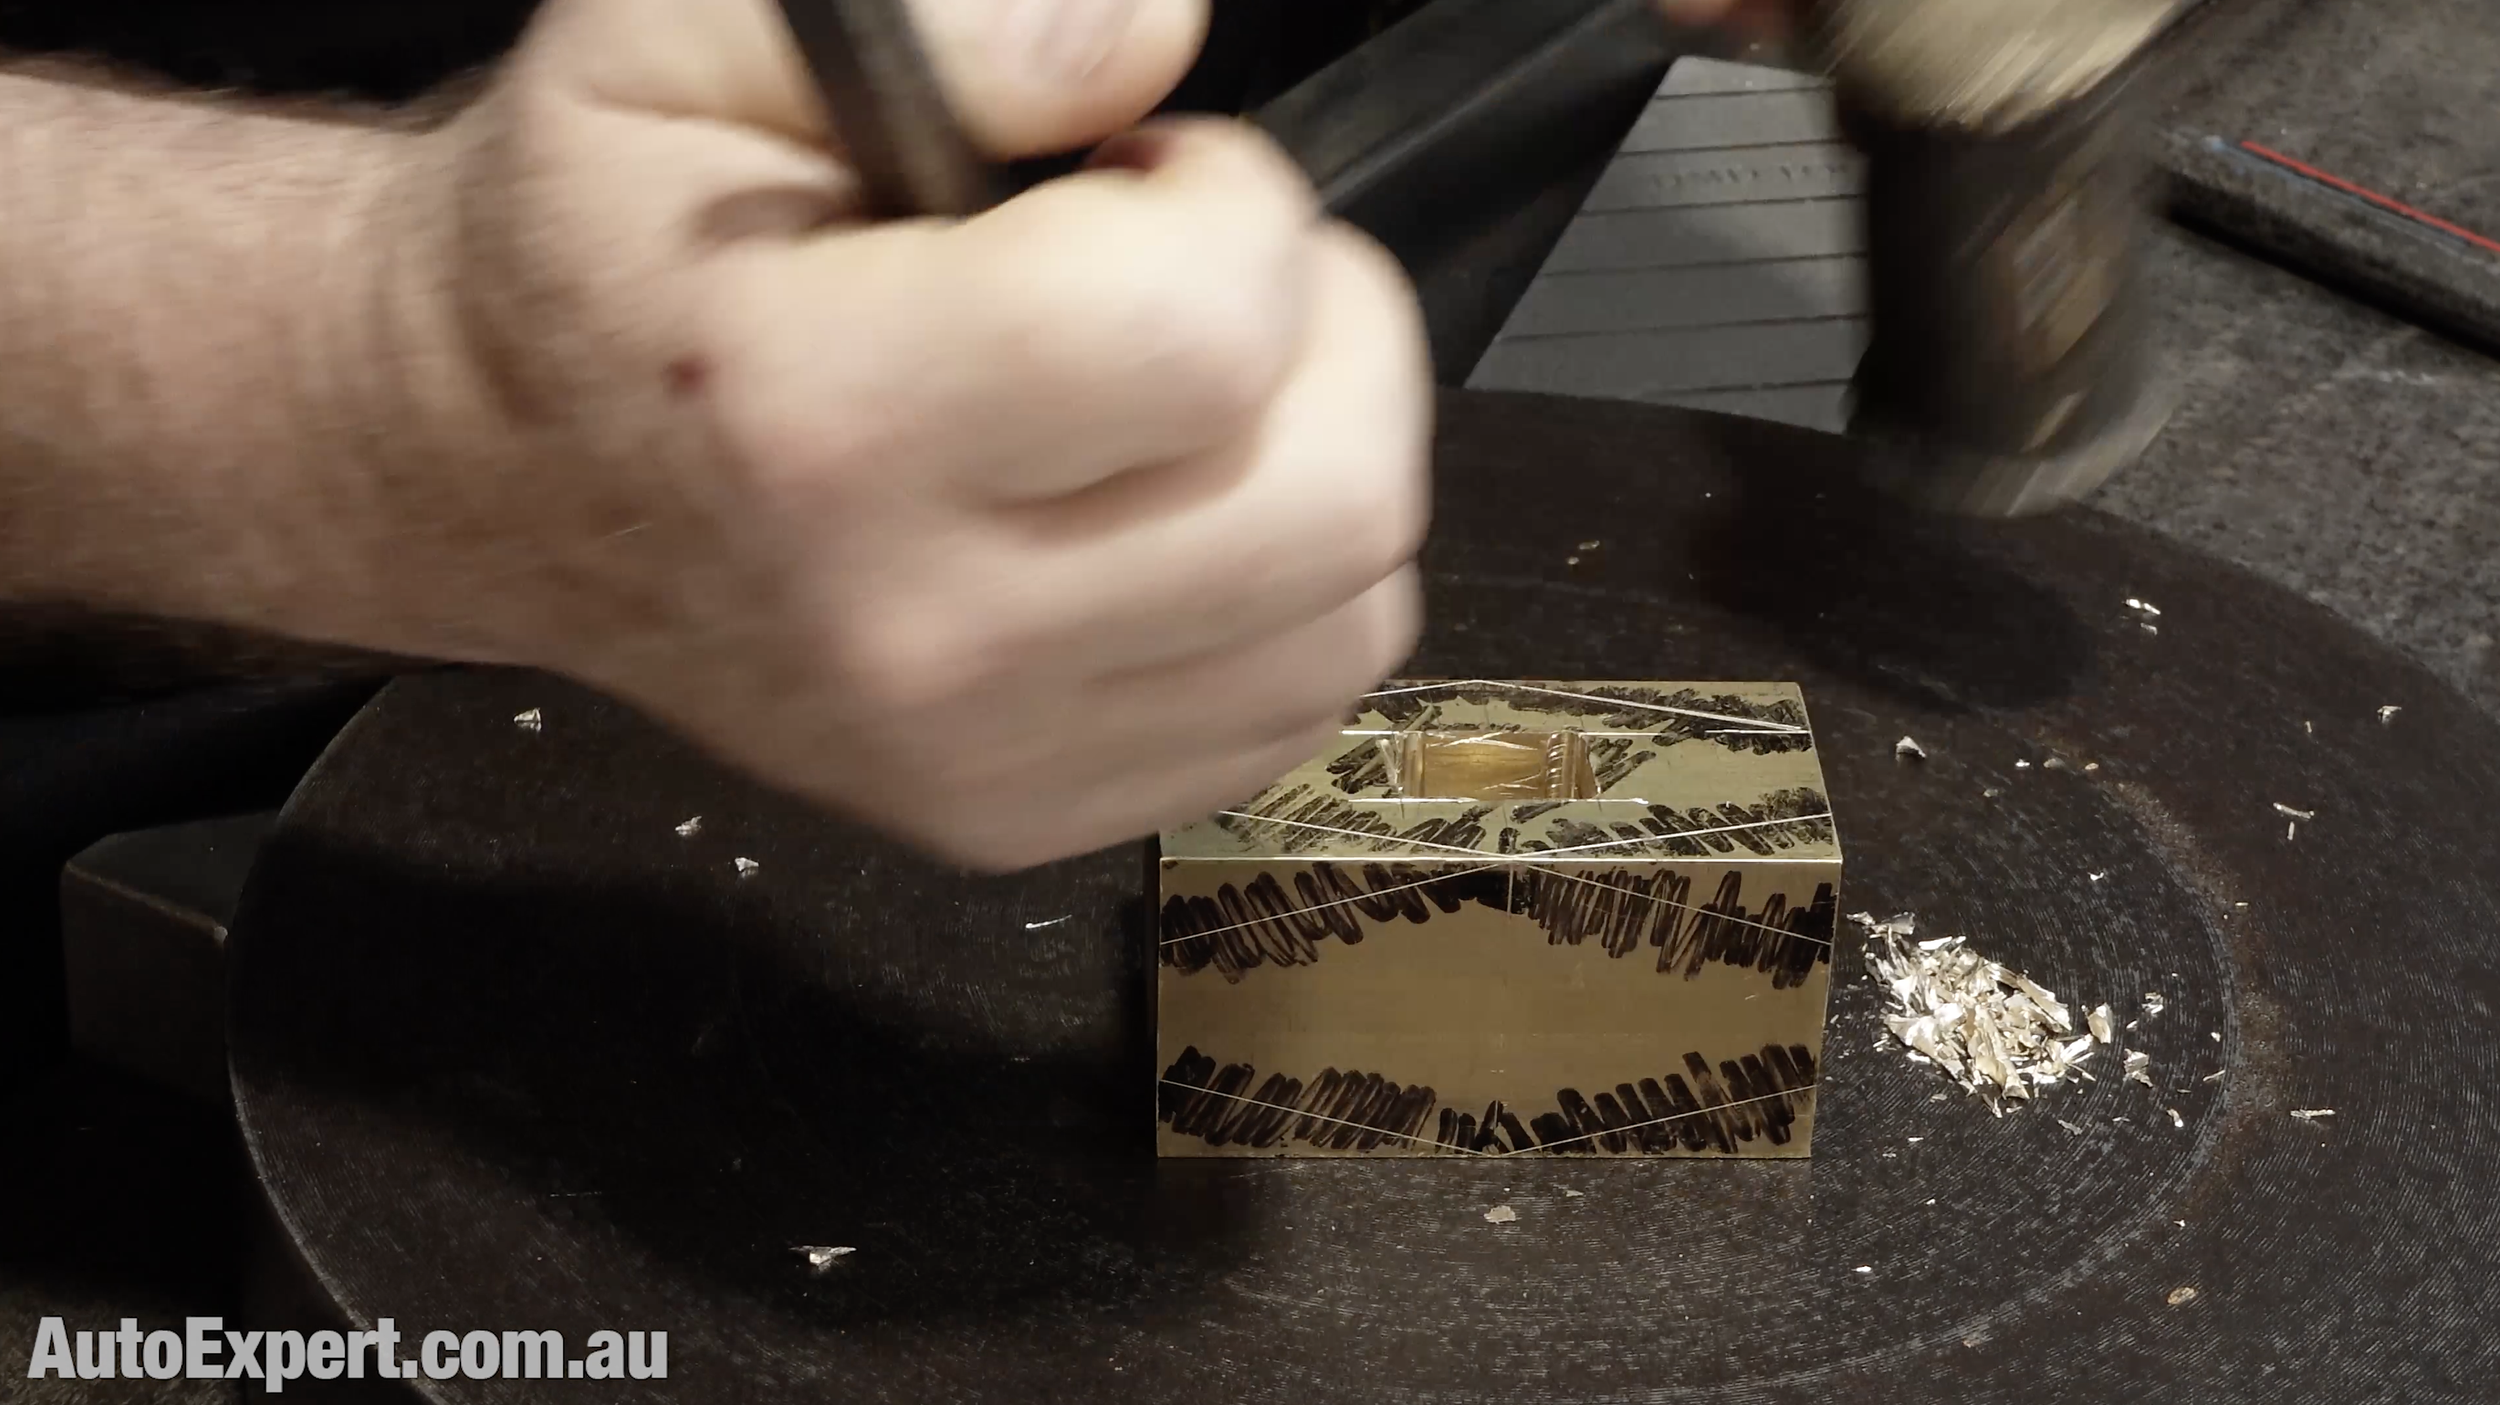
And, yeah - if you’ve done woodwork, this is not unlike that. (And brass doesn’t put up much of a fight, anyway.)
Step 3: Chisel to Shape
At this point, you’re basically cutting a timber mortice—just in brass.
Key points:
Work against a solid backing surface
Keep the walls straight
Expect it to be a bit agricultural
You’re aiming for a roughly ‘hourglass’ internal profile - that’ll keep the handle secure.
I save people thousands on new cars and home solar - there’s heaps less stress and no obligation in either case. Just help if you want it. New cars here. Home solar here.
Shaping the Head
Now you transition the block into something resembling a hammer.
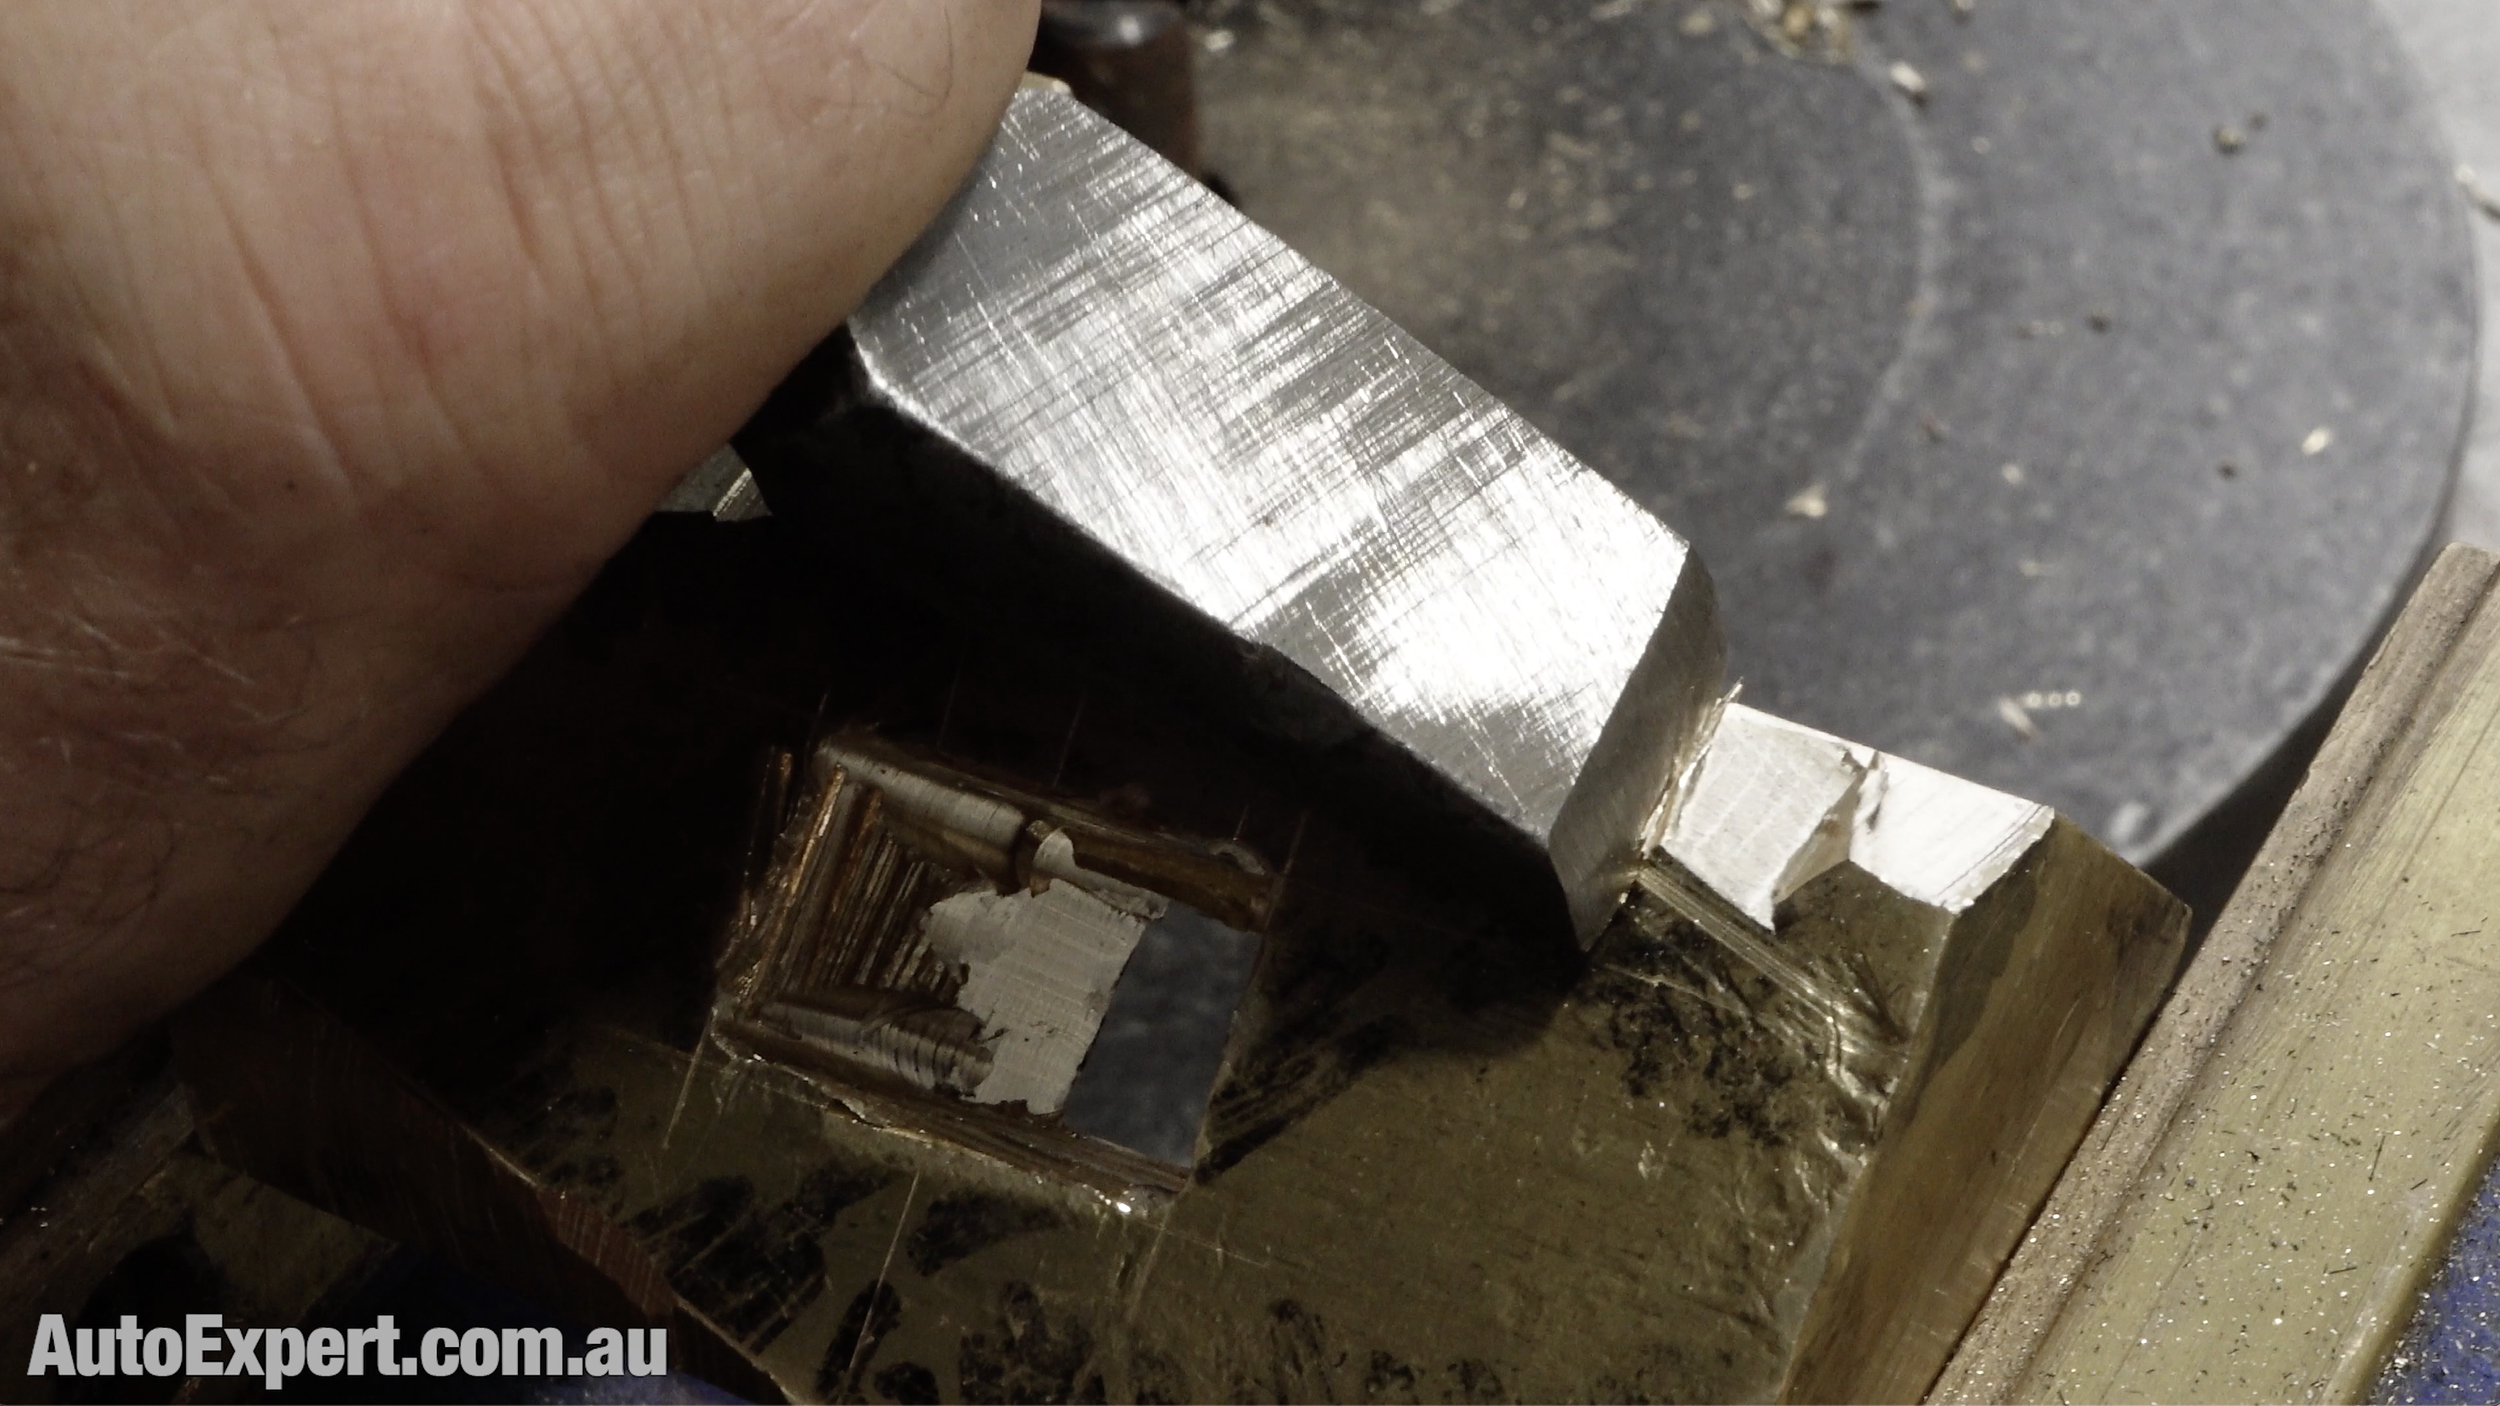

Step 1: Create the Octagon
Chisel and file down to your facet lines
Work into corners to avoid tearing material
Old-school cold chisel grind - same 60-degree angle as when you buy them, but only one primary bevel. Makes them much more practical if you’re not a blacksmith
Step 2: Refine the Facets
You don’t need perfectly flat planes
Slight curvature is fine (and easier)
Step 3: Round the Faces
Blend the octagon into a circular striking face
Do this by eye—no need to overthink it
Finishing
This is where it goes from “blocky” to “tool.”
File everything smooth
Sand progressively to remove tool marks
Break all sharp edges
Important details:
Leave slight radii in internal corners (reduces stress concentration)
Slight taper in the handle hole improves grip
Don’t over-polish—it’s a working tool
Aim for “clean and functional,” not “museum piece.”
I save people thousands on new cars and home solar - there’s heaps less stress and no obligation in either case. Just help if you want it. New cars here. Home solar here.
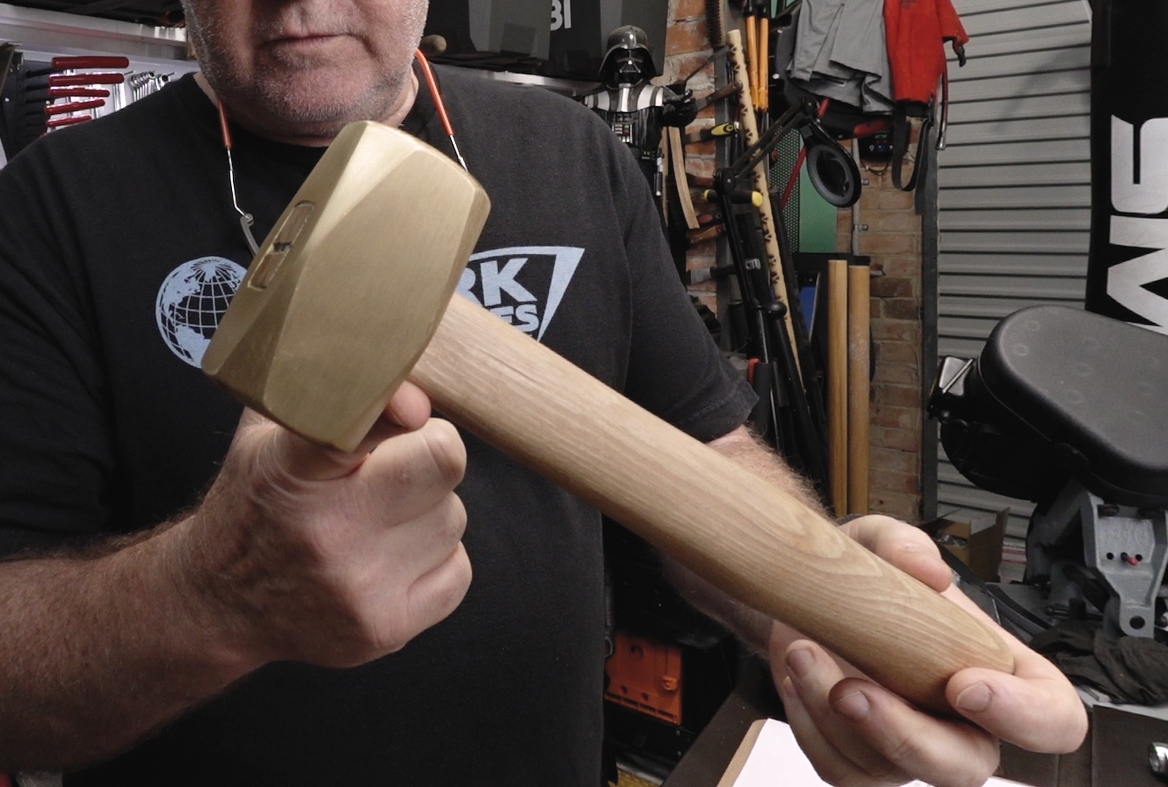
Making and Fitting the Handle
I used a recycled hardwood handle, about 320 mm long, loosely based on a standard hammer profile.
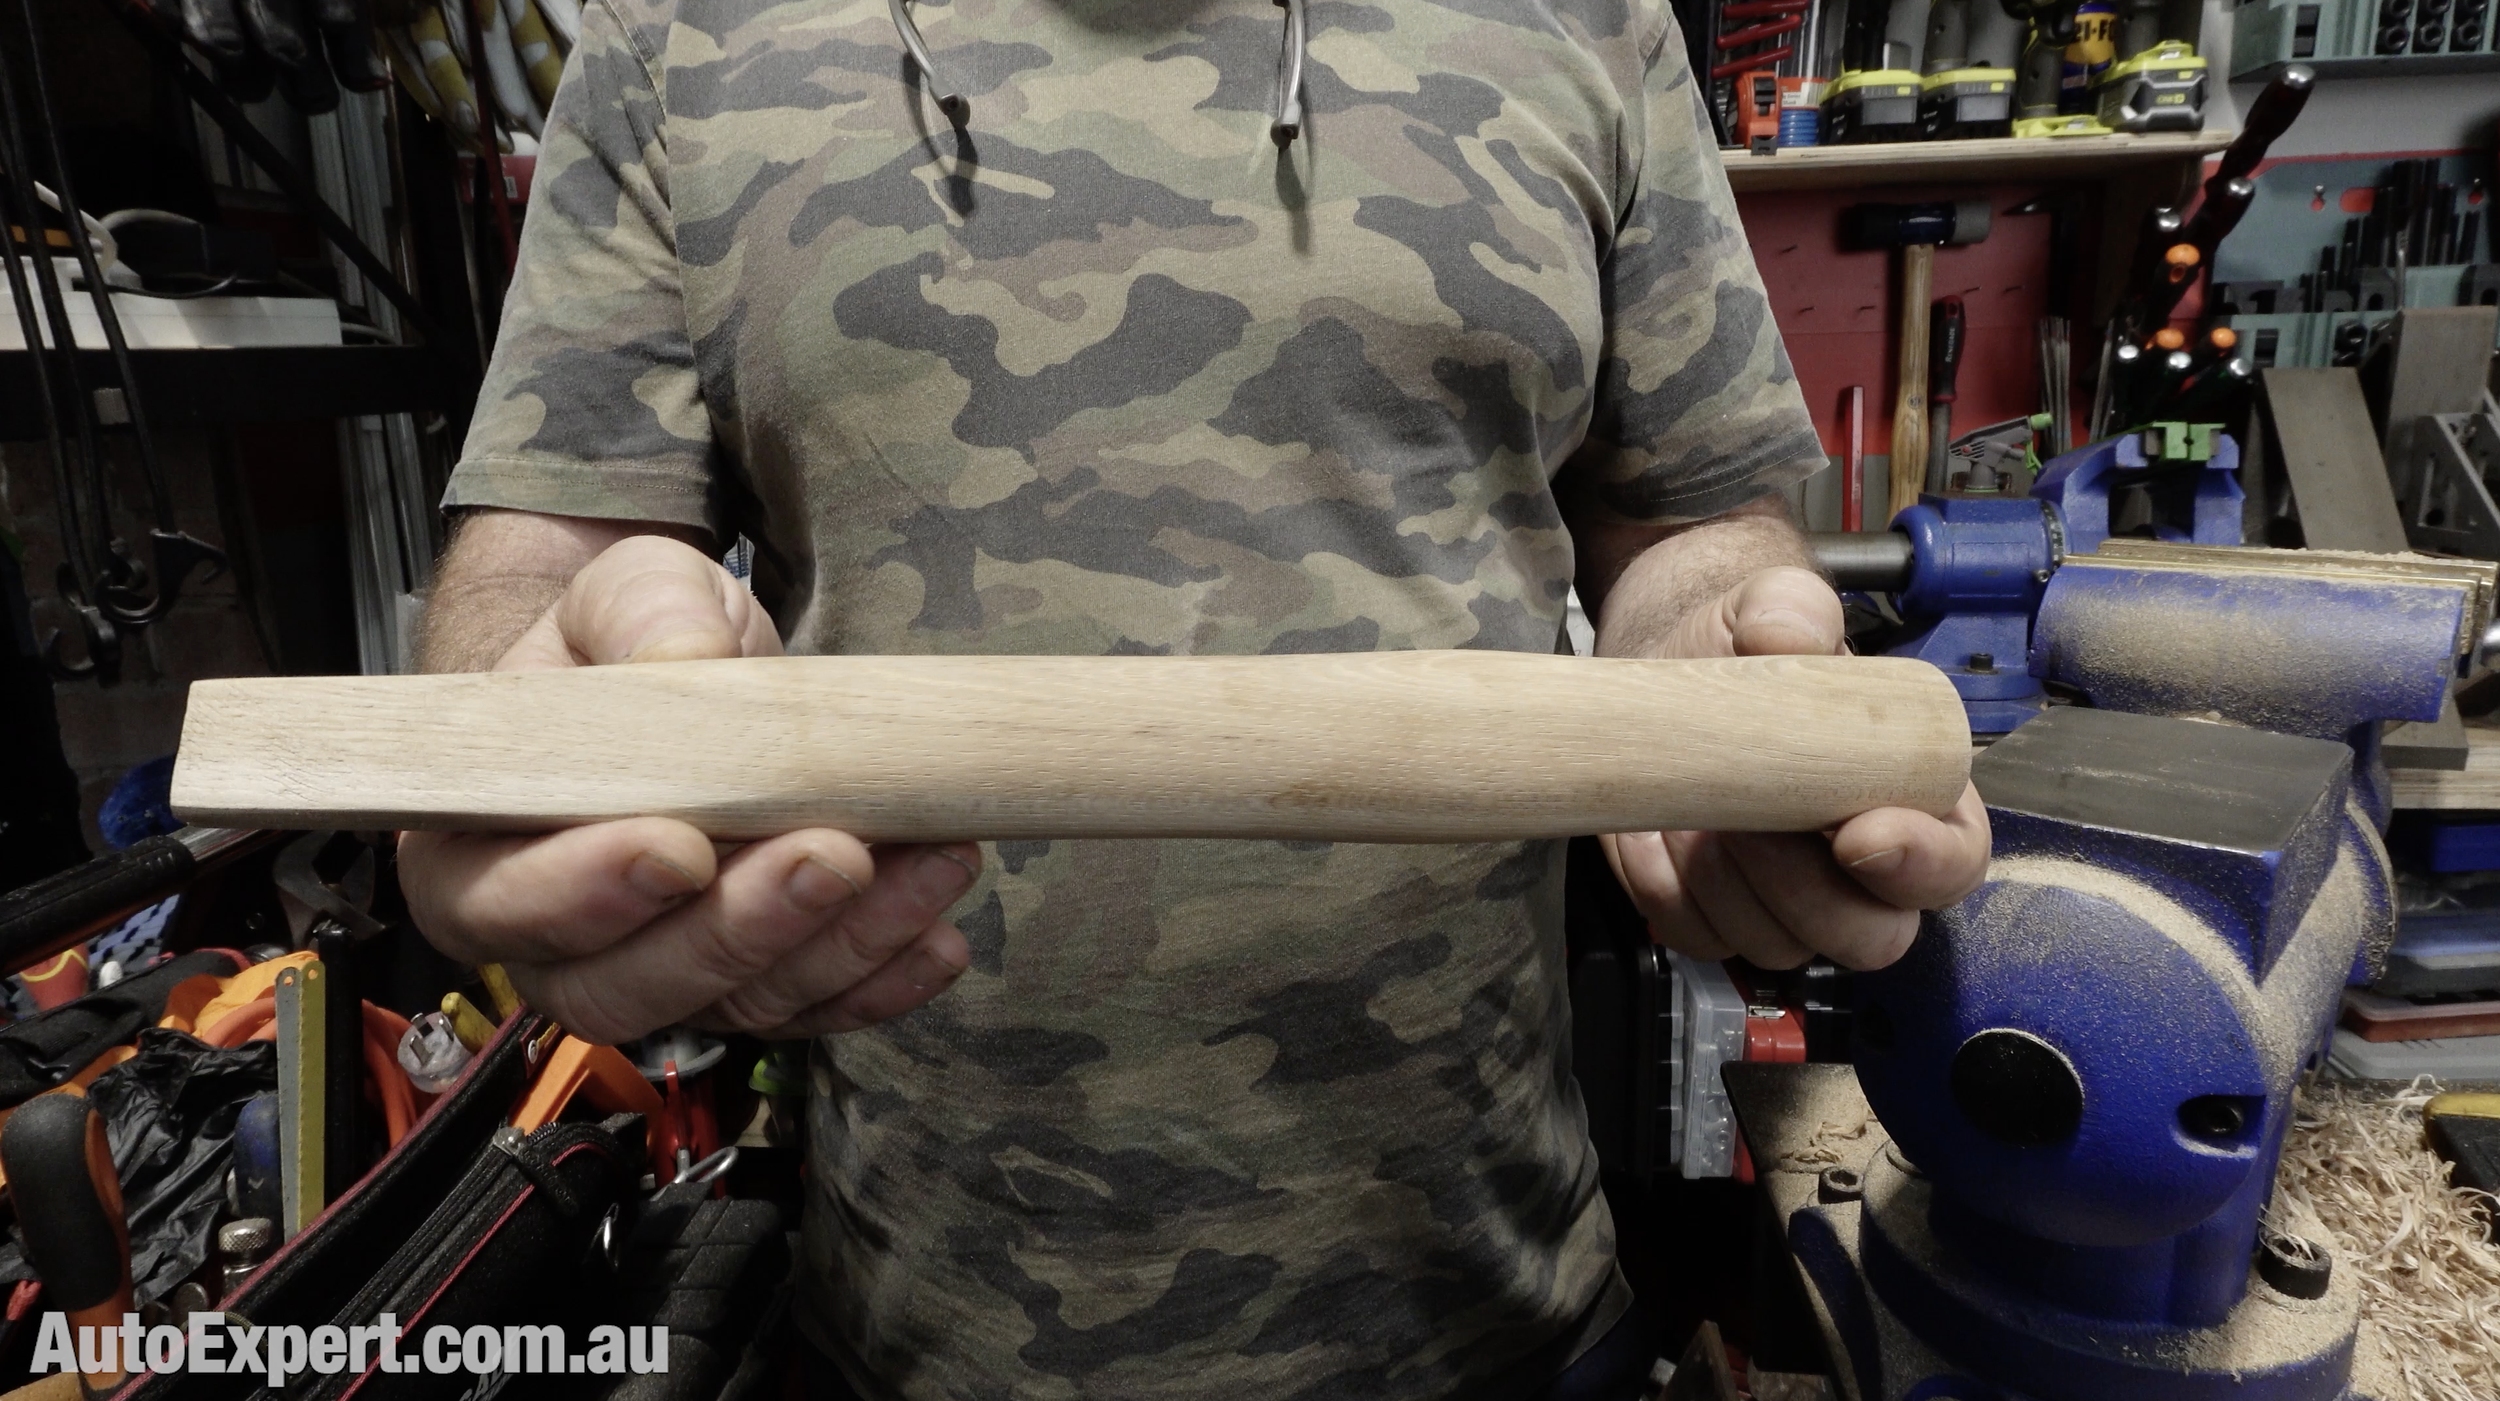
This handle got a second life (it was cut down from a broken sledgehammer handle, so: essentially free.
Fitment Process:
Shape the handle to suit the tapered eye
Drive the head on from below
Seat it firmly
If you have a press, great. If not:
Use a mallet
Or get a mechanic to press it on
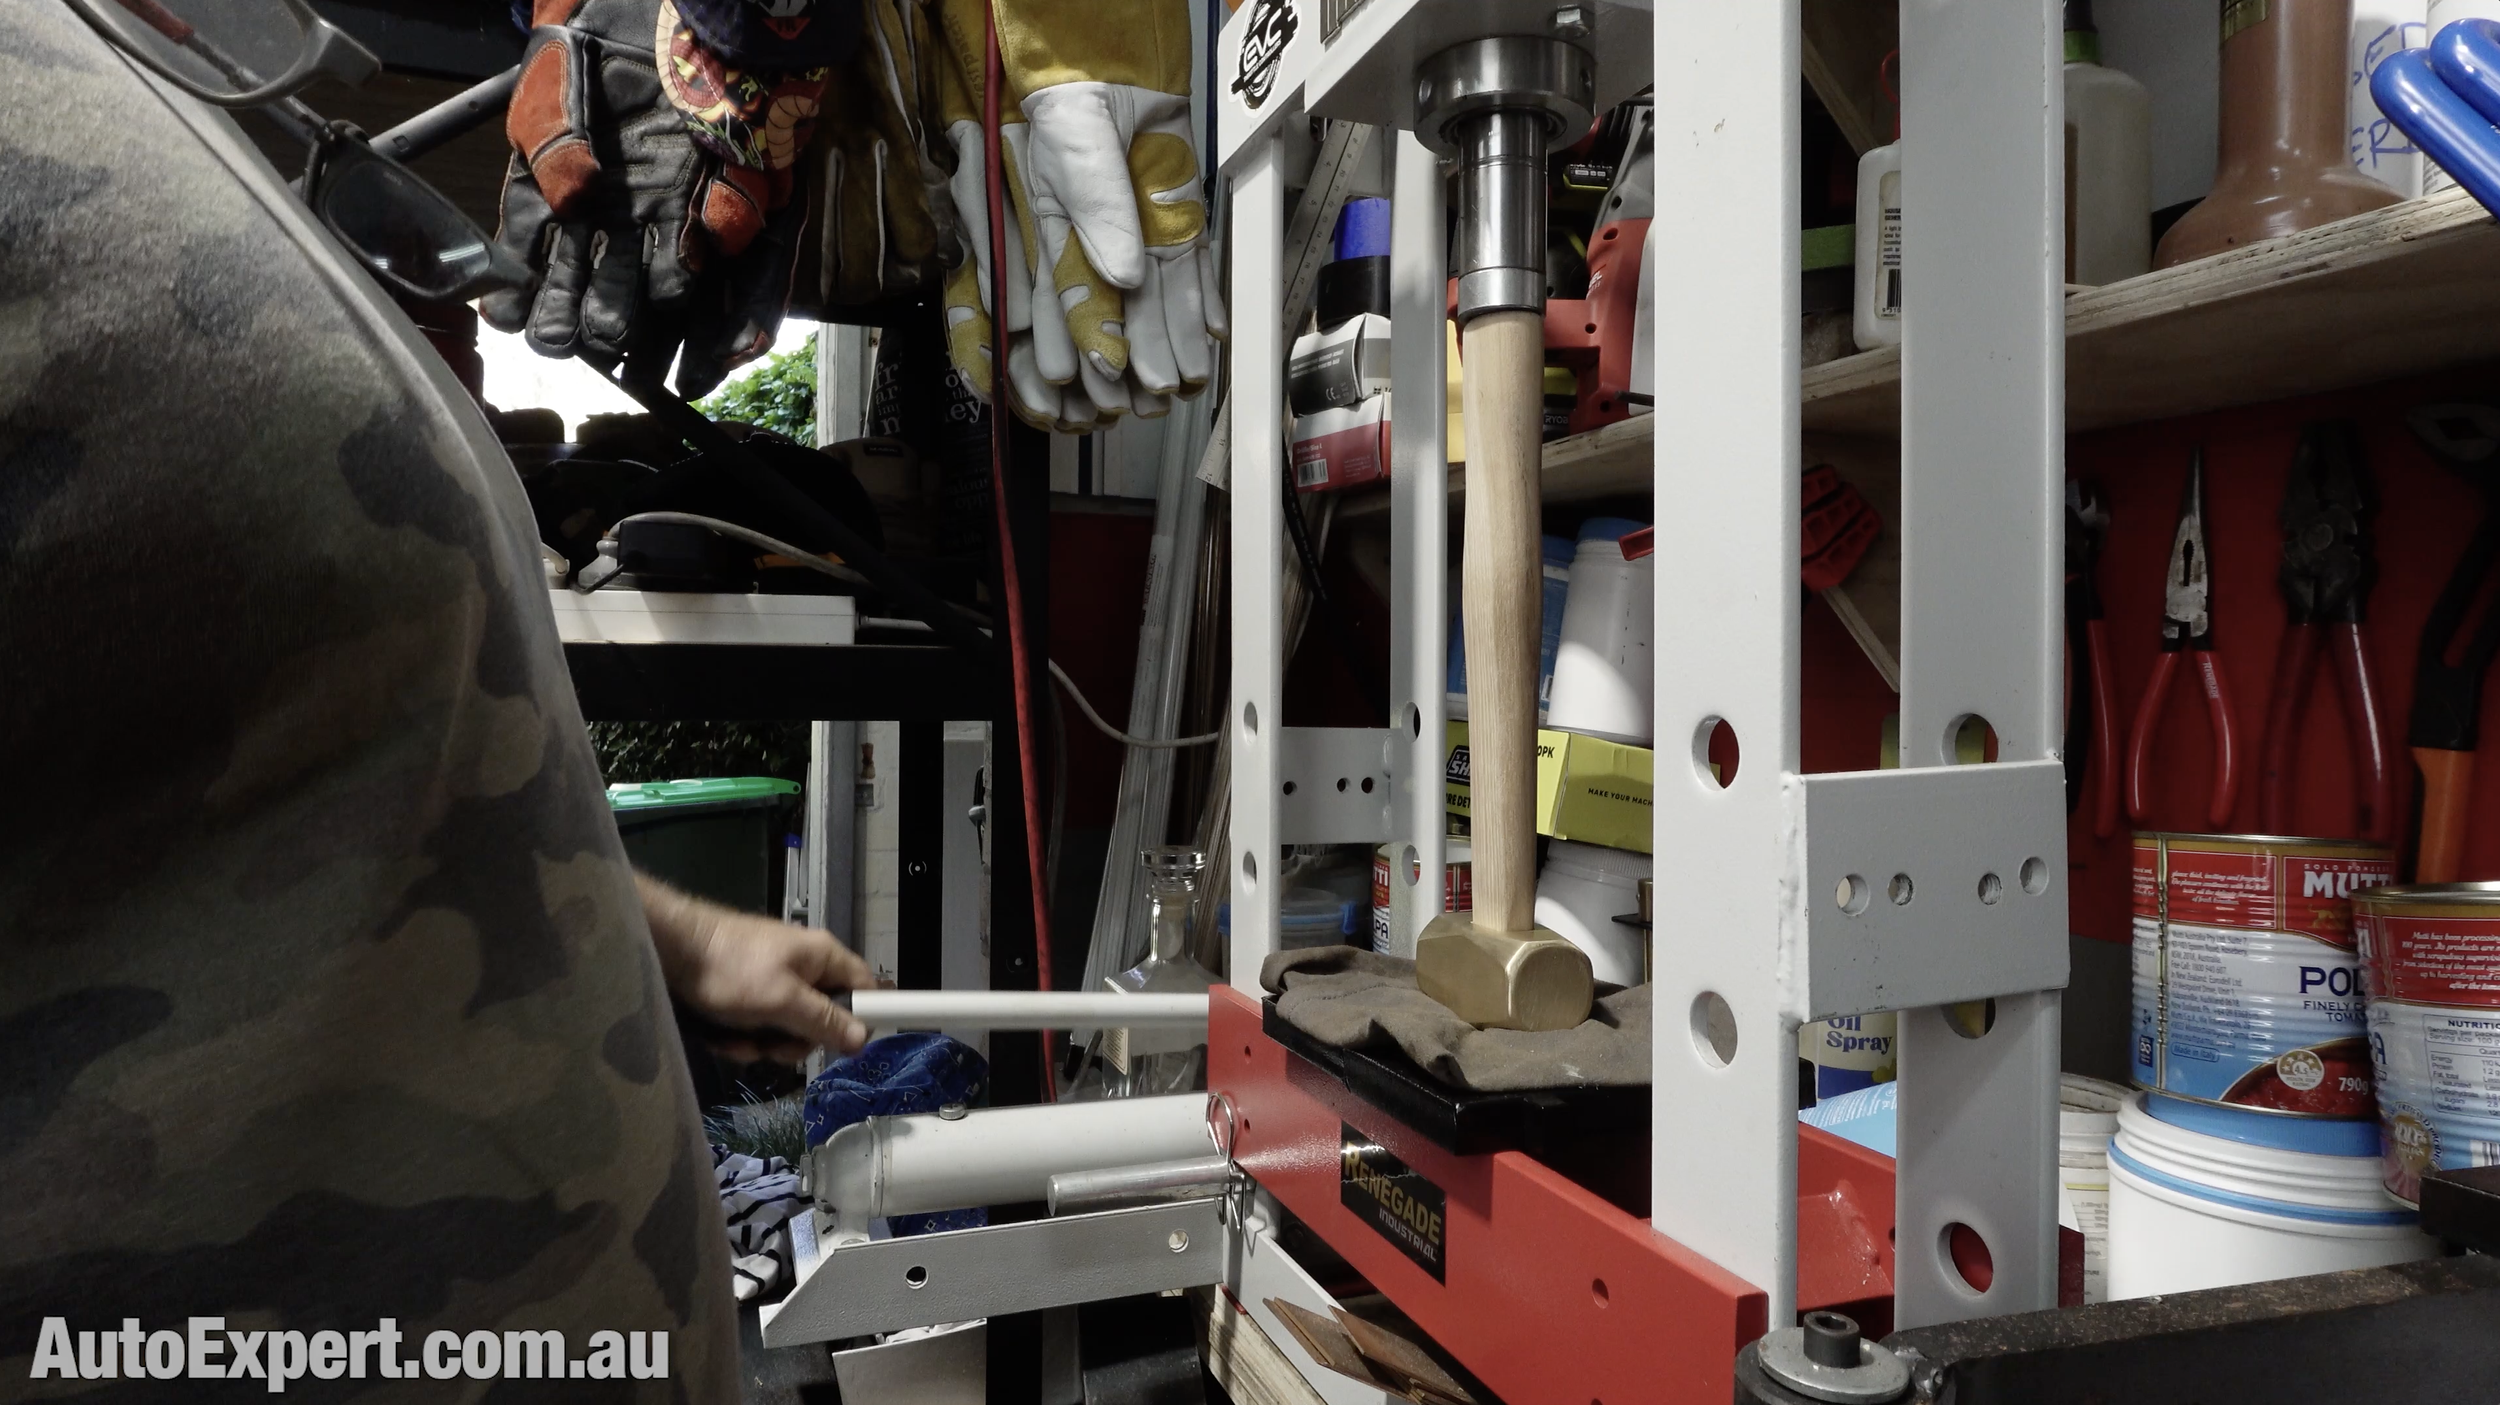
My one concession to ‘tool excess’ on this project - I pressed the handle into place. It just gives a batter result than nudging it home with a mallet (but the mallet works fine)
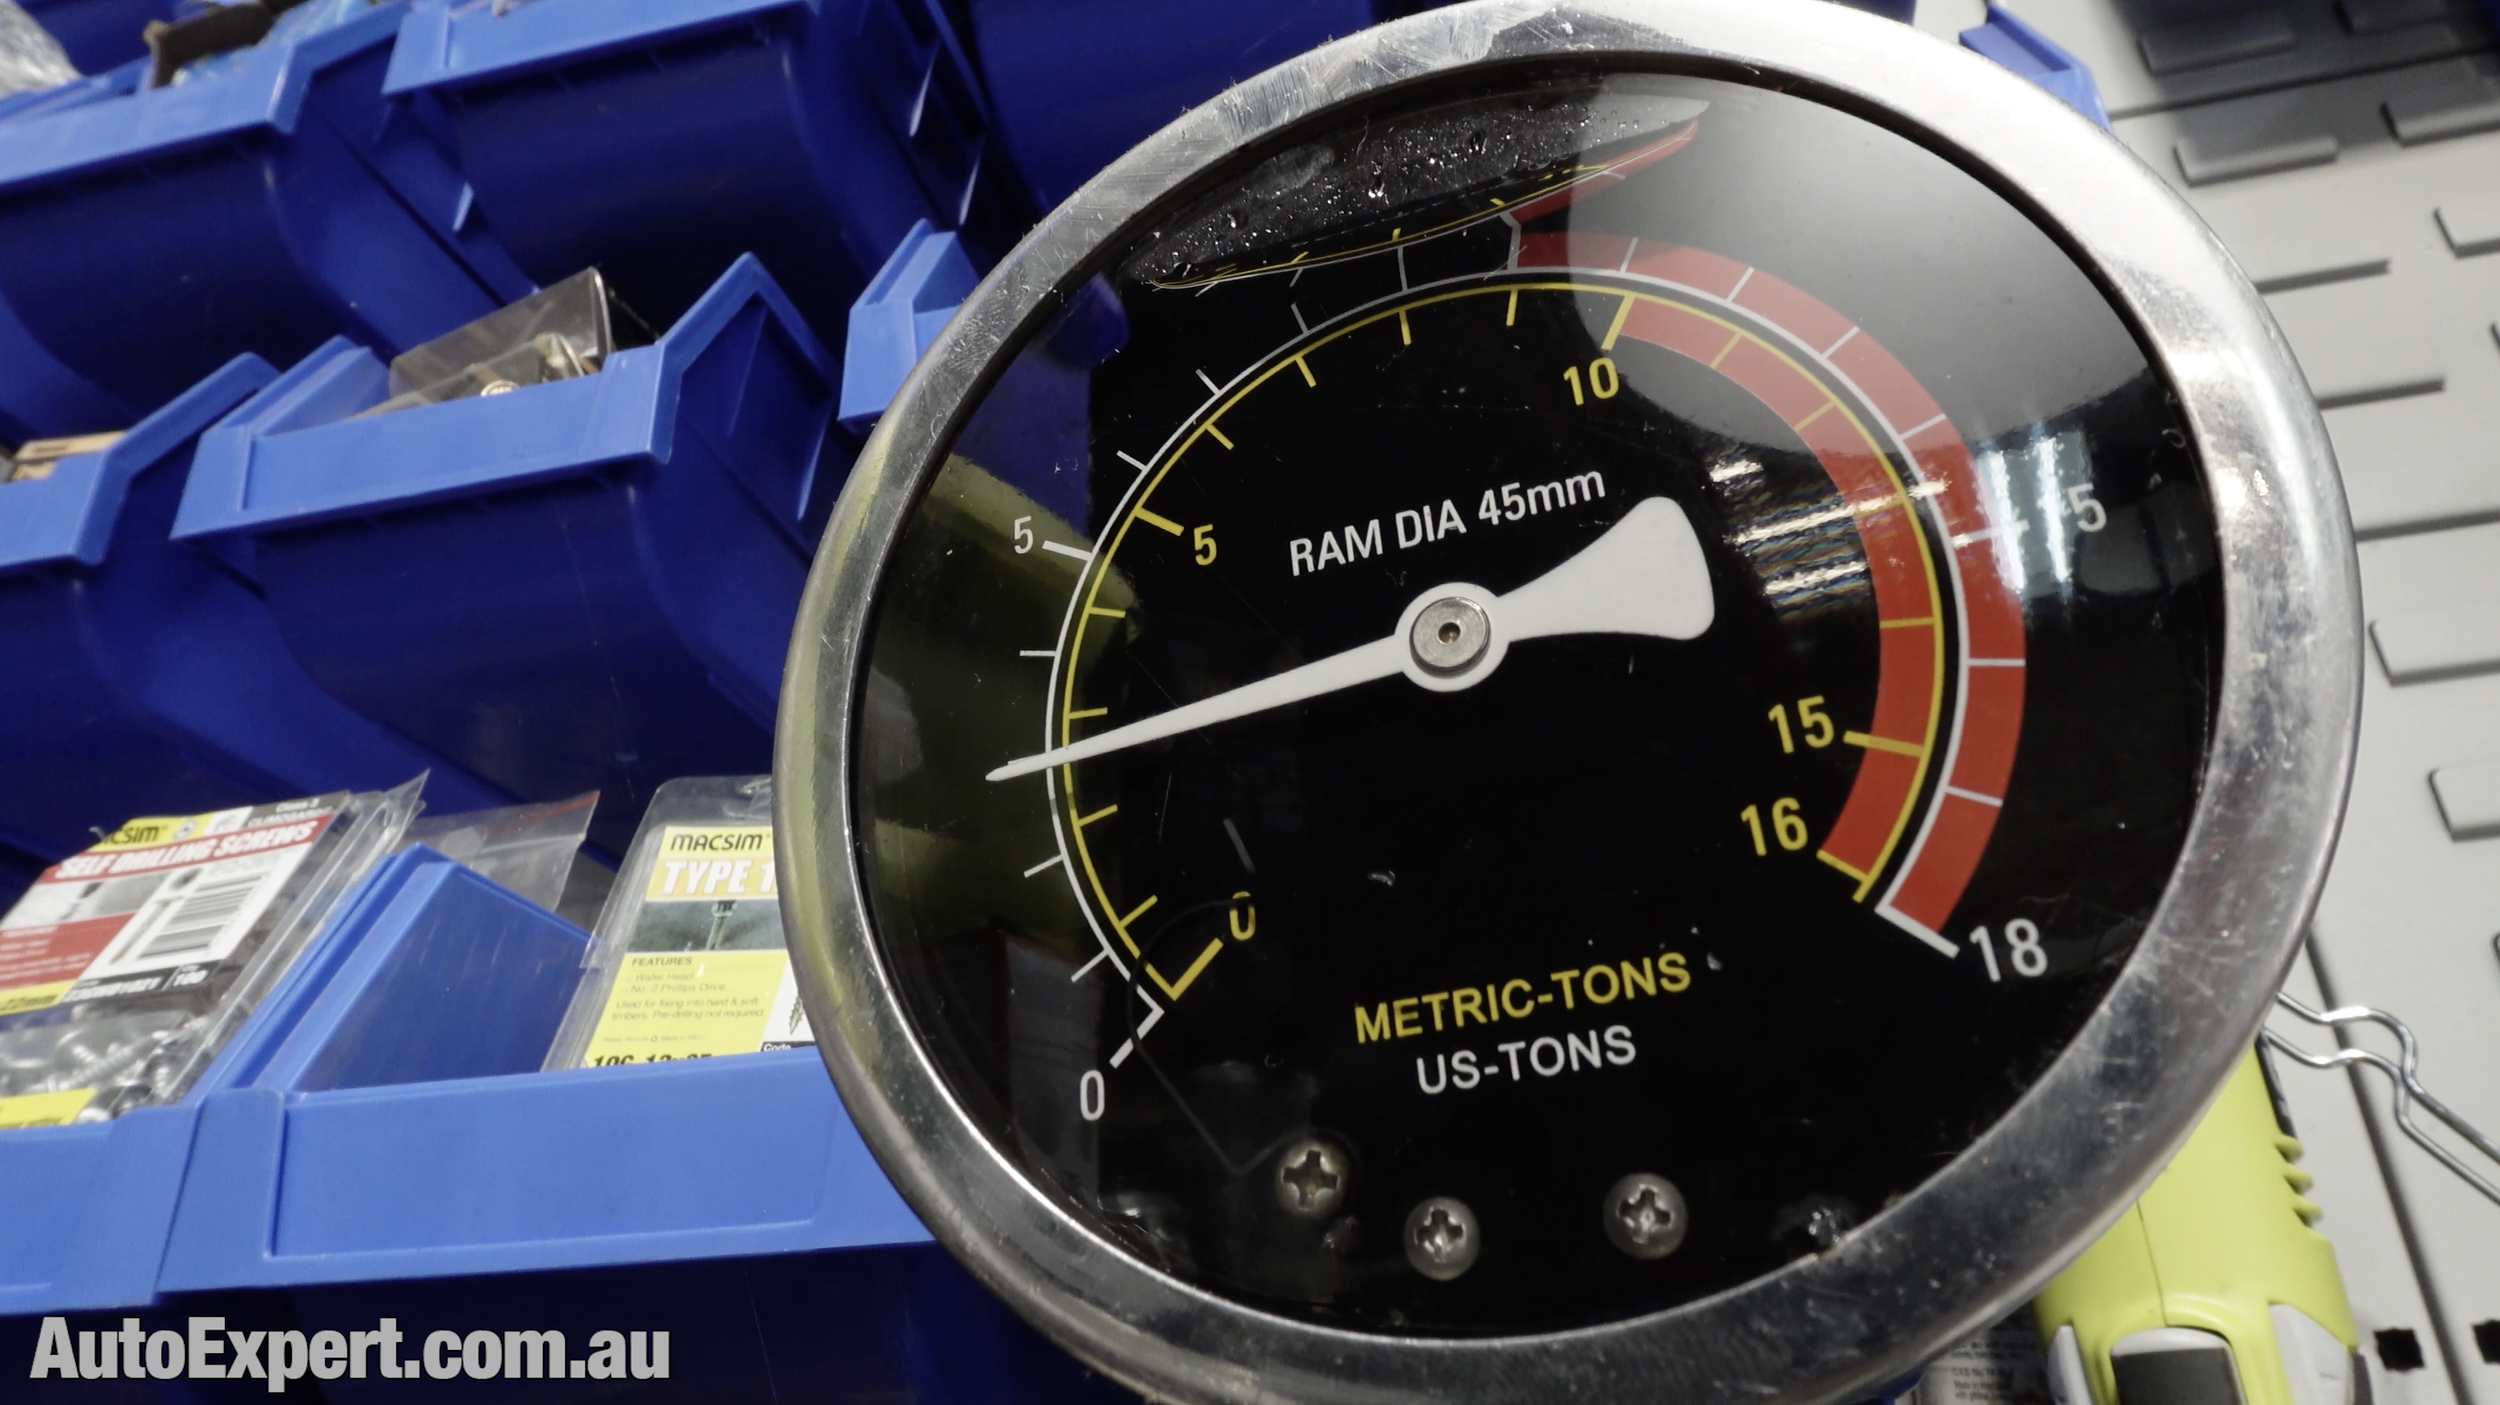
Slightly less than three (Chinese) tonnes was all it took to seat the handle firmly - that’s just over two Hiluxes…
Locking It In:
Add a longitudinal wooden wedge (glued)
Then a transverse steel wedge
Trim and sand flush.
The Result
End result - not bad, given the constraints: Had to take less than a day and use only basic tools. Pro tip: Basic tools are quite therapeutic when you commit to using them, in a way complex machine tools aren’t
You end up with:
A tool that feels excellent in the hand
A hammer that won’t destroy what you’re working on
Something you made yourself, from raw stock
And it will, statistically, last forever.
Final Thought
There’s something fundamentally different about making a tool versus buying one.
It’s not just utility—it’s capability.
You stop waiting. You start doing.
As Shakespeare put it:
“Our doubts are traitors…”
Or, translated more directly: Just get started.
Do it this weekend.
I save people thousands on new cars and home solar - there’s heaps less stress and no obligation in either case. Just help if you want it. New cars here. Home solar here.